

Video Editing Studio Design for Modern Creators
 August 13, 202620 Minutes
You've got the camera, the laptop, the backlog of edits, and a room that seems fine until you try to work in it for real. Then the problems show up fast, the desk feels too tight, the mic picks up every surface reflection, and the monitor is somehow both too close and too far. That's where video editing studio design stops being an aesthetic exercise and becomes an operational one. Flexwork Studios sees this every day with creators who need a space that can handle filming, editing, and repeat production without turning the room into a compromise. The difference between a room that looks polished and a room that works is usually in the planning, not the furniture.
Why Most Editing Rooms Fail Before the First Cut
A lot of creators build the room backwards. They buy a desk, add a light, hang a mic, then realize the chair blocks the shot, the cable run looks like spaghetti, and the monitor is too close for comfortable color work. By the time they notice the acoustic problems, the room is already full, and every fix costs more because it has to work around what's there.
Failure isn't bad taste; it's skipping the design phase. Post-production typically accounts for 25% to 35% of a total video budget in one industry dataset, and that's why every layout mistake hurts later. When editing takes longer than it should, the room starts taxing the business instead of supporting it, especially for creators producing content on a schedule. The economics of the room matter as much as the aesthetics.
Practical rule: build the room for the workflow you repeat every week, not the setup you only need on launch day.
For creators who want to skip the trial-and-error cycle, a turnkey option like Flexwork Studios' in-house studios can remove a lot of the guesswork. A professionally planned room prevents the usual retrofit cycle, where you keep moving furniture, adding panels, and rerouting cables after you've already started producing. That's the expensive way to learn what the room should've been from day one.
Sizing Your Space and Planning the Room Shell
The room shell sets the ceiling for everything else you can do. If the space is too small, gear choices stop mattering because desk depth, viewing distance, camera position, and acoustic treatment all compete for the same floor area. For a professional editing bay, one facility guide points to a standard editing room of 15' × 15' × 12' ceiling height, with a small edit room minimum of 10' × 12' × 10' for tighter builds source. That is the baseline for planning, not the comfort target.
A hybrid filming-and-editing room needs even tighter layout control. A production-studio planning guide recommends at least a 15' × 15' space with about 12 feet of ceiling height and placing the camera roughly 18 feet from the backdrop when possible source. In a smaller room, that spacing is not always possible, but the trade-off stays the same, more distance gives you cleaner framing control and reduces the chance that the background feels crowded or contaminated.
The shell should be judged before any purchase order goes out.
Start with the shell, not the hardware
The right sequence keeps expensive mistakes off the floor:
- Measure the room first. If the room cannot support the subject-to-camera distance, choose a different space before buying furniture or lighting.
- Map ceiling height and light paths. Lower ceilings limit lighting placement and make boom arm clearance harder to manage.
- Allocate infrastructure before purchases. HVAC, power, and cable paths need to be set before the desk and racks move in.
- Choose the editing format last. HD, 4K, and 8K all change workstation size, monitor count, and heat load.
The room has to support the load, not just the layout. Technical studio specifications for TV production spaces say 50% of the studio area should be matched for air-conditioning and 25% for power and lighting, with floor flatness typically kept to 0.25 in over 50 ft and true-to-edge flatness not exceeding 0.0625 in source. A room can look generous on paper and still become difficult to use once equipment runs hot, rolling stands need clean paths, and uneven flooring starts affecting placement.
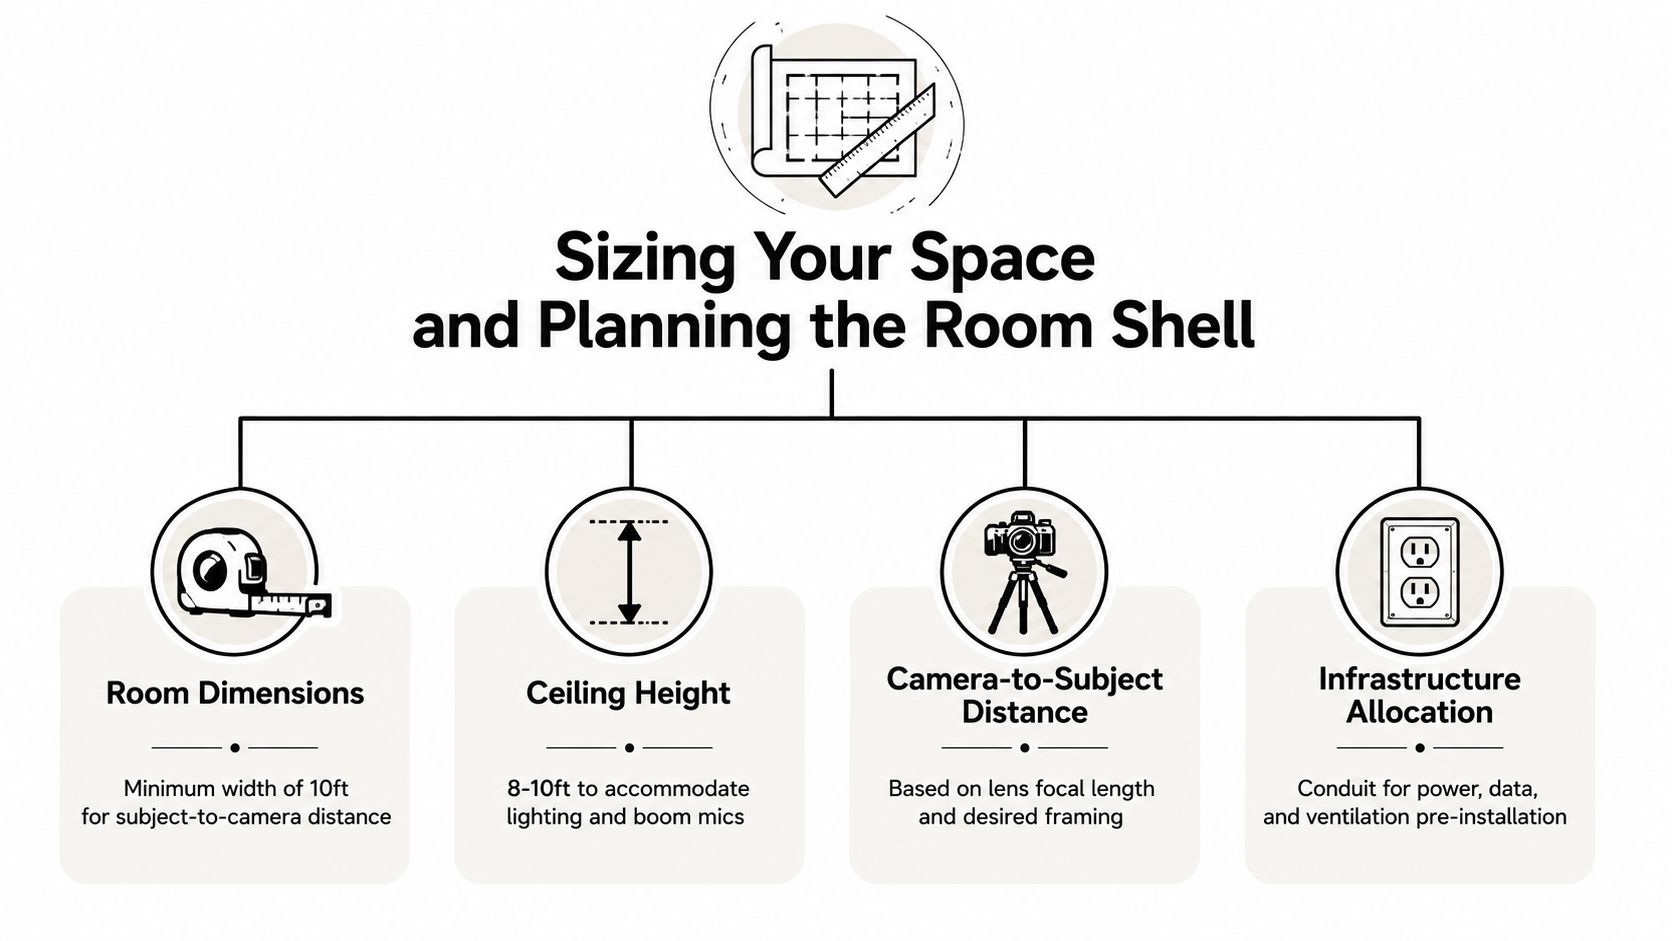
For a practical benchmark on how the shell, camera distance, and infrastructure work together, Flexwork's professional video recording studio setup shows the kind of room planning that should happen before the gear ever enters the space.
Designing a Hybrid Filming and Editing Workflow
Most creators don't need two separate rooms, they need one room that can switch jobs without wasting time. The problem is that filming and editing pull the room in different directions. Filming wants open sightlines, camera angles, and background depth, while editing wants ergonomic desk placement, screen focus, and clean cable access.
That conflict is why hybrid rooms fail when they're treated like one generic studio. A better approach is to divide the room into zones, even if the walls stay the same. Put the camera-facing side where light and background control matter most, then keep the editing station far enough away that the desk doesn't creep into the shot or block movement around the set.
Keep the filming path and the editing path separate, even if they share the same floor.
The practical detail many miss is routing. A dual-use room works better when power and USB routing are split between the filming side and the editing station, with dedicated cable paths that don't cross the center of the room. That's the same logic behind studio furniture guidance that separates the filming side from the work zone, because the fewer times you unplug and move things, the faster the room becomes to run.
For creators planning lighting, optimize lighting for content creators is a useful outside reference because lighting decisions affect both capture quality and how quickly a room resets between sessions. Good lighting in a hybrid room isn't just about looking polished on camera, it's about being able to return to the same shot setup every time without rebuilding the scene from scratch.
The smartest hybrid rooms also use a transition zone. That can be a movable panel, a rolling shelf, or a piece of furniture that helps the room shift from recording mode to edit mode without becoming cluttered. Flexwork's video production workflow is a strong example of how a room can stay visually clean while still handling repeated production cycles.
The embedded reference below is worth watching for creators who want to see the room logic in motion.

Ergonomic Desk and Monitor Placement for Long Edit Sessions
Long edit sessions punish bad ergonomics fast. The fixes that matter most are boring in the best way, correct desk depth, monitor height, chair support, and enough room for your elbows to move without hitting gear. For 4K work, the editing guide in the brief recommends systems built with 32GB RAM or more, a dedicated GPU, and a 4K monitor for color-critical review source. The workstation should support the workflow, not force the workflow to adapt to the desk.
Place the screen for the eyes, not the furniture
A desk that's too shallow creates a chain reaction. The monitor moves too close, the keyboard crowds your wrists, and the chair starts compensating for a layout that never had enough depth. That's why a layout built around monitor distance should come before decorative storage or extra accessories.
A practical workstation setup usually looks like this:
- Desk depth first: enough space for monitor distance, keyboard clearance, and an under-desk cable tray.
- Monitor height second: the top of the display should stay near eye level so your neck doesn't pitch forward for hours.
- Chair fit third: lumbar support matters more than the style of the chair, especially once revisions stack up.
- Peripheral placement last: keep the mouse, capture gear, and audio interface within a natural reach zone.
A dual-monitor setup can work well if one screen is centered for the current timeline and the second sits slightly off-axis for bins, scopes, or reference playback. The mistake is placing both panels symmetrically and then turning your head all day. That's how a “pro” setup becomes a neck strain machine.
If you can't reach your main tools without twisting, the layout is wrong, no matter how expensive the hardware is.
Clean cable management is part of ergonomics too. Under-desk trays, labeled velcro ties, and fixed routing paths stop the workstation from turning into a maintenance project every time you swap a peripheral. Flexwork's editing bays reflect that same logic, the room feels calm because the service paths are already planned into the layout.
Acoustic Treatment That Matches Your Content Goals
A lot of creators overspend here because acoustics feel like the safest place to throw money. The problem is that not every room needs full isolation, and not every content format benefits from the same treatment load. The right choice depends on whether you're recording spoken-word content, voiceover, or more dynamic visual material.
Soundproofing and acoustic treatment aren't the same thing. Soundproofing keeps outside noise out and inside noise in, while acoustic treatment shapes how the room sounds once recording begins. If your content is mostly dialogue, the most useful upgrades are often the ones that clean up speech and reduce room reflection, not the ones that turn the space into a sealed bunker.
The brief's comparison notes frame the trade-off clearly. For podcasts and voiceover, the room may justify heavier sound isolation and broadband absorption, while music video or more dynamic content can often work with lighter treatment and a smarter visual setup. That's a better budgeting mindset than treating every room like a broadcast control suite.
Flexwork's acoustic treatment overview is a helpful reference if you're deciding how much room control you need. In practice, the best investment is usually the one that improves repeatability without making the room feel dead, cramped, or visually overbuilt.
For many creators, the smarter move is to treat the room where the voice lives and leave the rest of the layout flexible. That keeps the set usable for filming, editing, and quick client sessions without locking the room into one acoustic personality.
Hardware and Network Infrastructure for Fast Workflows
A fast editing room is fast because the hardware, network, storage, and power all follow the same workflow. The physical layout and the tech stack need to be planned together, not added one after the other, or the room starts fighting the edit instead of supporting it.
The software side has changed the hardware side. Editors now work across local drives, cloud review tools, and shared project folders, so the room has to support quick file offload, stable syncing, and clean collaboration paths. That is part of why a studio needs to be wired for the way work moves now, not just for the machine sitting on the desk.
Build the stack around your real editing habits
The workstation should match the heaviest job you expect to do, not the easiest one. If you cut in 4K, hand projects to other people, and move media constantly, the room needs storage and network paths that can handle that pattern without slowing down the day. Cloud collaboration tools are now common in professional editing, which makes cable routing, router placement, and local backup more important than many people budget for at the start.
A practical breakdown helps:
- Local edit speed comes from the workstation, GPU, RAM, and fast storage.
- Team handoff speed comes from cloud collaboration and clear file organization.
- Recovery speed comes from backup discipline and redundant storage.
For network layout inspiration, Networking2000's network design for Essex is a useful reference because the same principles apply in creative rooms, stable infrastructure beats improvisation. The room should make it easy to offload, archive, and sync without cables crossing the floor or interrupting the edit bay.
Flexwork's guide to the best video editing software fits here because software choice changes storage needs, proxy workflows, and the way the room should be wired. Once the hardware and network are laid out properly, the space stops feeling like a collection of devices and starts working like a production system.
Building Your Studio in Phases Without Compromising Quality
The cleanest way to build a studio is in phases, but the order matters. Start with the room shell and the workstation basics, then improve the workflow layer, then finish with the upgrades that make the space feel fully professional. That approach protects the budget while keeping the room usable at every stage.
A phased build also keeps you from overbuying in the wrong category. If the desk is poor, a second monitor won't save the setup. If the room can't handle power or heat, premium gear only makes the problem louder. A sensible build sequence keeps the investment aligned with the bottleneck.
The final checklist should look like this:
- Room evaluation. Confirm size, ceiling height, power, and HVAC before signing or renovating.
- Furniture. Choose a desk and chair that fit the actual work posture, not the mood board.
- Gear. Add monitors, camera support, and audio only after the room can physically support them.
- Commissioning. Test the full workflow, document settings, and make sure the room resets quickly.
If you're sizing the room for future growth, workplace expansion square footage tips can help you think more clearly about how quickly a creative space gets tight once the team or production load increases. That's the point where a rented studio starts to make more sense than forcing one room to do every job.
Flexwork Podcast Studios offers studio rentals, Content Day sessions at $3000/day including 20 edited reels or 60 pro photos, and production packages for creators who want a more complete setup. If you're ready to stop rebuilding the room every time the content schedule gets busier, visit Flexwork Podcast Studios and book a tour or inquiry today.