Build Your Professional Video Recording Studio Setup
Meta title: Build Your Professional Video Recording Studio Setup
Meta description: Build a professional video recording studio setup with smart gear, better acoustics, and a faster path to polished content.
URL slug: /professional-video-recording-studio-setup
Primary keyword: professional video recording studio setup
Secondary keywords: video studio setup, podcast video studio, studio lighting for video
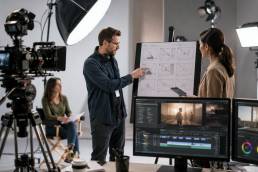
You're probably at the point where your content ideas are better than your setup. The message is strong, the camera angle is awkward. The guest is great, the room sounds hollow. You sit down to record one clean episode and lose momentum to cables, shadows, software quirks, and retakes.
That gap matters. A rough setup doesn't just make your content look less polished. It makes you slower, less consistent, and harder to trust on screen.
A professional video recording studio setup fixes that, but only when it's built with intention. Gear alone won't save a bad room, and expensive cameras won't rescue weak audio. The point is to create a recording environment that feels effortless to the viewer and efficient for the creator. That's also why so many ambitious creators eventually look toward turnkey spaces like Flexwork Studios. It represents the finish line of this whole process: broadcast-quality production without the constant troubleshooting.
Introduction
Most creators don't hit a wall because they've run out of ideas. They hit a wall because their setup starts fighting them.
You can only tolerate so many episodes with muddy audio, blown-out lighting, and a background that looks like an afterthought. At first, DIY feels resourceful. Then it becomes a drag on your schedule and your standards. You stop thinking like a host, founder, or creative director and start thinking like unpaid tech support.
That's the core reason to care about a professional video recording studio setup. It's not about buying fancy gear to feel legit. It's about building a system that makes your content look composed, sound clear, and come out consistently. If you're serious about video podcasts, branded interviews, courses, or thought leadership content, quality stops being accidental and starts being repeatable.
From DIY Burnout to Broadcast Ambition
The biggest problem with DIY isn't that it looks homemade. It's that it steals your attention.
When your setup is inconsistent, every session starts from zero. You're adjusting exposure, testing mics, moving lamps, muting appliances, checking focus, and hoping the file records properly. That's energy you should be spending on delivery, storytelling, guest prep, and distribution.
The hidden cost of doing everything yourself
A weak setup creates friction in places creators often ignore:
- Recording gets slower: You spend too much time solving technical issues before you say the first useful sentence.
- Your brand looks unstable: One episode feels polished, the next feels flat, because the lighting and sound shift from session to session.
- Editing becomes cleanup work: Bad source footage forces you to repair instead of refine.
- Creative confidence drops: It's hard to perform well when you don't trust what the audience will see and hear.
Practical rule: If your production process makes you hesitate to press record, the process is broken.
That's why “good enough” is a trap. A creator can outgrow a casual setup long before they outgrow their talent.
Quality problems usually start before editing
People love to blame post-production. Most of the time, the damage happens earlier.
Echo starts in the room. Harsh shadows start with poor light placement. Distracting footage starts with weak framing and cluttered backgrounds. File delivery problems start when you never decided how the content would be exported and shared. If you handle client work, branded content, or remote approvals, it helps to understand basics like choosing the ideal video format for clients before your workflow gets messy.
There's also a mental shift that serious creators need to make. A studio isn't a vanity purchase. It's production infrastructure.
You don't build one because you want to play director. You build one because consistency is part of the product. If your audience, clients, or sponsors see you on camera, the environment becomes part of your credibility.
For a clear comparison of where DIY starts falling short, Flexwork's breakdown on studio vs DIY podcasting and what you gain by going pro is worth reading. It frames the decision the right way. Not as ego, but as efficiency, polish, and output quality.
Your Studio Blueprint Space and Acoustics
Before you shop for cameras, pick the room.
That decision shapes everything that comes after it. A camera can be upgraded. A bad room keeps punishing you every time you record.
Space first, gear second
One practical benchmark from Epiphan's guide is a room no smaller than 12 feet by 18 feet, with at least 4 feet between camera and subject and another 4 feet between subject and background. The same guide also recommends two camera angles for more dynamic production and suggests an uplink speed of at least 15 Mbps for livestreaming reliability, which makes space planning and network stability part of the setup, not an afterthought (Epiphan's corporate video production studio guide).
That layout matters because depth creates separation. Separation creates a more polished image. If your subject is pushed against a wall, the shot looks cramped and shadows get uglier fast.

Soundproofing and acoustic treatment aren't the same thing
Creators blur these together all the time. They shouldn't.
Soundproofing is about stopping outside noise from getting in. Traffic, HVAC, footsteps, doors, neighboring rooms.
Acoustic treatment is about improving what happens inside the room after sound enters it.
If your room sounds splashy or boxy, the microphone is hearing reflections bouncing off bare walls, ceilings, desks, and windows. That's what gives you reverb, flutter echo, and that “recorded in a kitchen” feel.
Use this framework:
| Priority | What it solves | Smart move |
|---|---|---|
| External noise | Interruptions in recordings | Pick the quietest room you have |
| Reflections | Echo and muddy dialogue | Add soft surfaces and panels |
| Room layout | Framing and flexibility | Leave depth behind the subject |
What to do in a real room
You don't need to start with a construction project. You do need to stop pretending an empty room is fine.
- Start with location: A room away from street noise and shared walls will save you more headaches than any plugin.
- Soften the surfaces: Rugs, curtains, upholstered furniture, and acoustic panels all help reduce reflections.
- Control the background: A deliberate set looks more professional than a random wall full of clutter.
- Respect the room shape: Narrow, hard, reflective spaces make both audio and camera placement harder.
The room is part of the recording chain. If it sounds bad, every expensive device in it becomes less useful.
If you need a practical primer, Flexwork has a useful guide on how to soundproof a room. It's a good next read if your biggest problem is noise intrusion rather than gear quality.
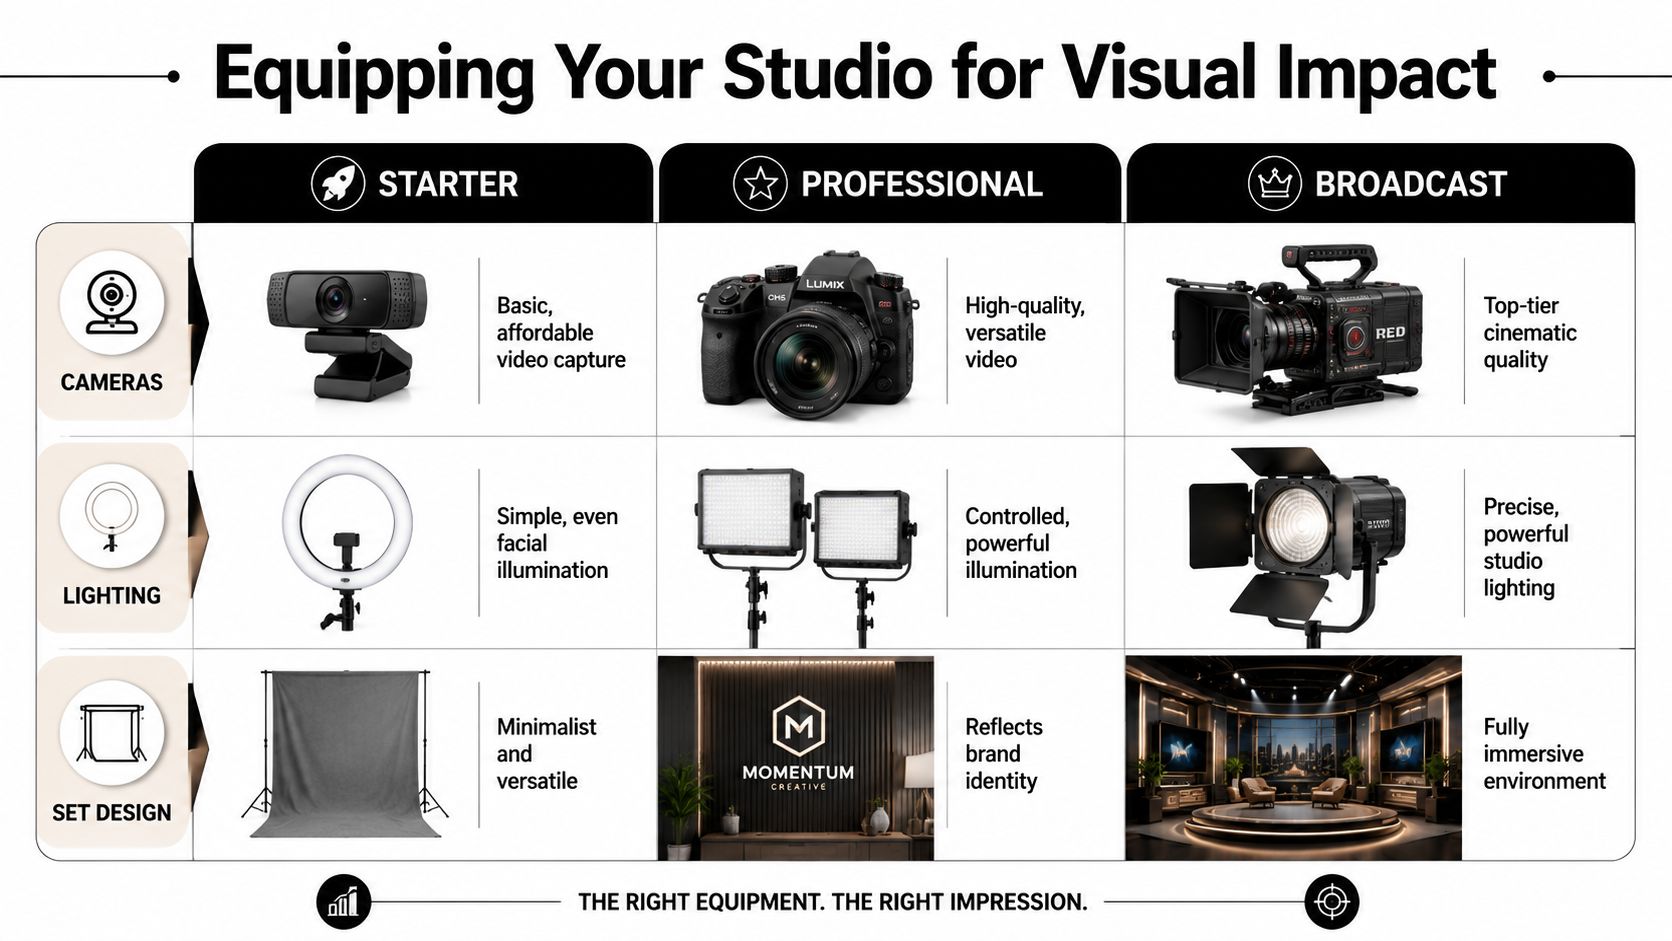
Equipping Your Studio for Visual Impact
A common mistake is overspending on the wrong visual upgrade.
They buy a camera before they've fixed the light. They buy lights before they've chosen a decent background. They obsess over specs while their framing still looks accidental. A polished visual setup works because the pieces support each other.
Here's the simplest way to think about it. Your image quality comes from camera choice, lighting control, and set design. If one is weak, the others can't fully carry the result.
Starter versus professional versus broadcast
One published budget example shows a functional home studio build at $782, while a more professional camera setup alone can cost over $1,800. The same source notes that industry expectations have shifted toward HD and 4K cinema cameras, which tells you where “professional” now begins in the market (home video studio setup breakdown).
That doesn't mean everyone should sprint to the expensive tier. It means you should understand what each level buys you.
Starter setup
This is where many creators should begin. Think high-end webcam or basic camera, one simple lighting source, and a clean background.
Use it if your goal is consistency over cinematic polish. The win here is repeatability. You can record often and keep your image from falling apart.
Good starter choices usually include:
- Simple camera capture: A dependable webcam or entry-level camera that doesn't require complex rigging
- Basic facial lighting: A ring light or one soft key light placed intentionally
- Minimal set design: A neutral wall, continuous backdrop, or one branded element
This level works, but it has limits. The image tends to feel flatter, the background can look generic, and your flexibility with lenses and depth is limited.
A quick visual reference can help before you buy or reposition lights. This guide to professional headshot lighting setups is useful because strong portrait lighting principles translate well to talking-head video.
Professional setup
This is the sweet spot for creators who are publishing often and want the content to feel premium.
A mirrorless camera gives you stronger image quality, better lens options, and more control over the look. LED panel lights or softbox-style lighting let you shape the scene instead of just blasting brightness at your face. The background starts serving the brand.
Think in terms of three-point lighting:
- Key light: Your main source. It defines the face.
- Fill light: Softens shadows so you don't look harsh or dramatic by accident.
- Back light: Separates you from the background and adds depth.
Lighting is what makes a professional setup look expensive, even when it isn't.
This is also where set design matters more than people expect. A strong background should look intentional, not busy. Use color, texture, practical decor, shelving, signage, or furniture that supports your identity without distracting from the speaker.
A practical walkthrough helps here:
Broadcast setup
Broadcast-level production is for brands, networks, agencies, and creators whose content is central to the business.
That usually means cinema-oriented cameras, more precise lighting control, and a set that's built rather than improvised. At this level, every frame has intent. Multiple angles, polished backgrounds, and consistent color matter because the content is expected to hold up everywhere from YouTube to clips, ads, and embedded website media.
If lighting is the part you're still wrestling with, Flexwork's guide to the best lighting for video recording gives a practical breakdown without drowning you in gear jargon.
Building Your Professional Audio Chain
Bad audio kills trust faster than imperfect video.
Viewers will tolerate a slightly softer image. They won't stay with hiss, room echo, clipping, or dialogue that sounds distant. If your video matters, your audio chain needs to be boring in the best possible way. Clean, stable, repeatable.
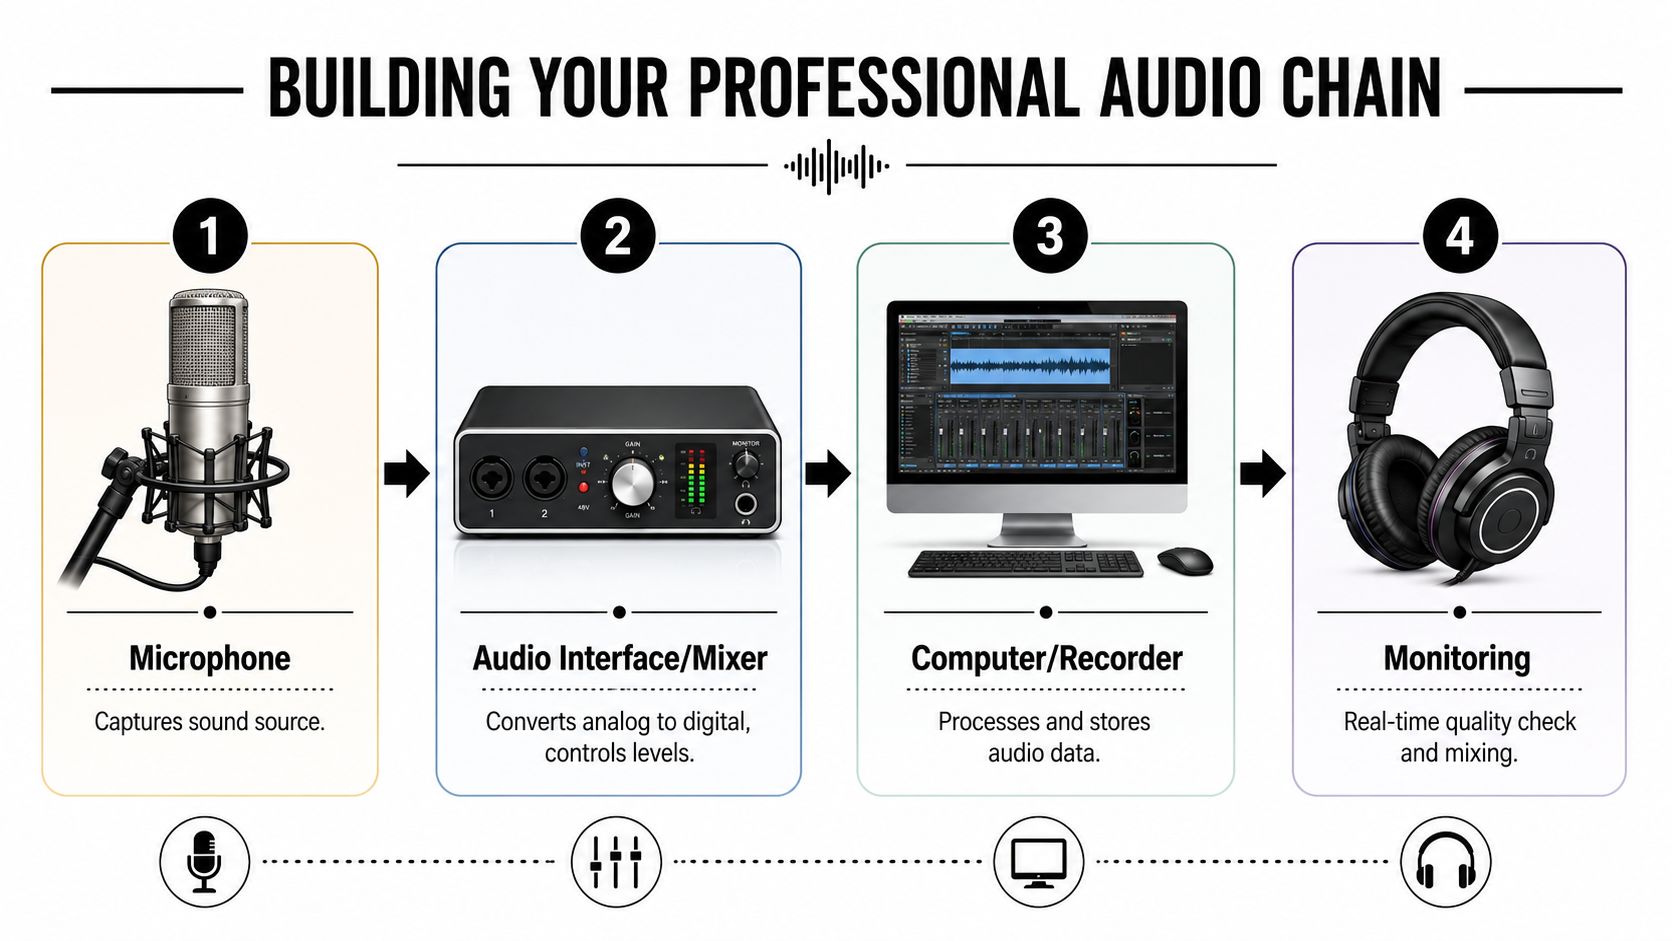
Think of audio as a chain of command
Your signal travels through a sequence. If one link is weak, the whole recording suffers.
- Microphone captures the voice.
- Audio interface or mixer converts and controls the signal.
- Computer or recorder stores it.
- Monitoring tells you whether the result is usable.
That's why random upgrades don't work. A good microphone in a reflective room still sounds rough. A decent mic with careless gain staging still clips.
The settings that matter most
One engineering guideline recommends keeping DAW input peaks between -12 dB and -6 dB so the signal stays above the noise floor while preserving headroom to avoid digital clipping. The same source emphasizes balanced XLR or TRS cabling, pop filters for vocals, and monitor placement in an equilateral triangle with tweeters at ear level for more reliable playback decisions (professional recording studio setup guidance).
That sounds technical, but the practical takeaway is simple:
- Too quiet: You raise noise when you boost the track later.
- Too hot: You distort the signal and damage the take.
- Just right: You get clarity and room to work in editing.
Record clean, not loud. Loud is easy to add later. Distortion isn't easy to remove.
Smart choices for spoken-word video
You don't need a giant rack of equipment. You need a signal path that suits voices.
A few grounded rules help:
- Use a pop filter: It reduces plosives and keeps vocal takes smoother.
- Choose balanced cables: They reject noise better than casual consumer cabling.
- Monitor with intention: Laptop speakers lie. Closed-back headphones help during recording, and proper monitors help when you're judging edits or mix balance.
- Match mic type to room: If the room is lively, many creators prefer a more controlled microphone approach rather than something that grabs every reflection.
If you're still narrowing down mic options for voice-first content, Flexwork's guide on the best microphone for podcast recording is a useful place to compare what fits spoken-word production.
The Flexwork Advantage Skip the Setup Entirely
Building your own studio teaches you a lot. It also shows you exactly why so many serious creators stop halfway and look for a turnkey solution.
A proper room takes planning. Lighting takes testing. Audio takes discipline. Set design takes taste. Then you still have to record, edit, package, publish, and market the content. That's fine if production itself is your hobby. It's not fine if your business depends on showing up on camera without wasting half the day.

Why the DIY path often leads to a service model
Most creators don't want to become studio engineers. They want polished content.
That's the key distinction. Learning how a professional video recording studio setup works is valuable because it sharpens your judgment. It helps you spot weak rooms, lazy lighting, and poor audio decisions. But once you understand how many moving parts are involved, the efficient choice becomes obvious. Use a ready-made environment and keep your attention on performance, message, and distribution.
A turnkey option's value is realized as you remove setup time, reduce technical risk, and get a space designed for content from the start.
Where Flexwork fits
For creators in the NJ and NY orbit, Flexwork's in-house studios offer an example of that turnkey model. The company provides acoustically treated podcast and video rooms, production support, editing, and growth-oriented services, which makes it useful for creators who want a professional environment without building one from scratch.
That matters because there are really three different needs in this market, and they don't require the same answer.
You just need the room
If your workflow is solid and you mainly need a polished place to shoot, hourly studio rental makes sense. You get the environment without committing to a full buildout at home or at the office.
This is often the smartest move for:
- Guest interviews
- Batch recording days
- Branded content shoots
- Creators testing whether studio-grade production improves their output
You need production support
Some creators don't need hand-holding, but they do need a producer. Someone who keeps the session clean, catches mistakes, shapes the recording flow, and helps the final content look coherent.
That's where a package like Be My Podcast Producer fits the market well. It's the middle lane between total DIY and total delegation. You still show up as the face and voice, but the polish isn't resting on your shoulders alone.
If you're spending your best creative energy troubleshooting, you're using your role badly.
You want the growth machine, not just the room
This is the serious-business category. You're not recording for fun. You're building a media asset.
The stronger play here is a done-with-you or done-for-you package that covers production, management, and marketing support together. Per the service brief, Content Days are $3000/day and include 20 edited reels or 60 pro photos. Podcast websites are $5000 plus hosting. And the Market, Manage & Produce My Podcast tier starts at $1500 per episode with a 20-episode growth commitment.
That pricing isn't about gadgets. It's about strategic advantage. A structured content day can replace scattered production. A podcast website gives the show a credible home base. A managed package turns the show into an ongoing system instead of a recurring scramble.
The smarter question to ask
Don't ask, “Can I build this myself?”
Ask, “Should I be the one solving all of this every week?”
If the answer is no, then a professional service stops being a luxury and starts becoming a time decision. That's especially true if your content supports client acquisition, authority building, recruiting, partnerships, or long-form brand storytelling.
Conclusion
A professional video recording studio setup is part room science, part visual direction, part audio discipline, and part workflow design. Learning how it all fits together makes you a better creator because you stop guessing. You start seeing why some content feels sharp, calm, and credible while other content looks patched together.
But the lesson most ambitious creators arrive at is even more useful. You don't win by becoming obsessed with cables, acoustic reflections, and light placement. You win by delivering strong ideas in an environment that supports them.
DIY is a smart education. It teaches standards. It builds taste. It helps you understand the production chain well enough to make better decisions. Then, for many creators, it becomes a stepping stone rather than the final destination.
If your current setup is slowing you down, don't keep treating production problems like a personality trait. Raise the standard. Build smarter, or skip the build and record in a space designed to make your content look ready for the audience you want.
If you're ready to stop troubleshooting and start recording at a higher level, explore Flexwork Podcast Studios and book a tour or ask about production support that fits your show.