
How to Master Podcast Audio: A Pro-Level Guide for 2026
 June 28, 202624 Minutes
Meta title: How to Master Podcast Audio for a Professional Sound
Meta description: Learn how to master podcast audio with pro-level recording, mixing, and mastering tips that help your show sound polished and ready to publish.
URL slug: how-to-master-podcast-audio
Primary keyword: how to master podcast audio
Secondary keywords: podcast audio mastering, podcast mixing tips, professional podcast production
You've probably had this moment. The interview was sharp, the ideas were strong, and the conversation had real energy. Then you listened back and the episode felt smaller than it should. The voice sounded thin, the levels moved around, and the final result had that unmistakable DIY ceiling.
That gap is where most ambitious creators get stuck. The content is there. The brand is taking shape. But the audio still doesn't carry the same authority as the message.
Learning how to master podcast audio is what closes that gap. It's not just about making a file louder. It's about making your show feel broadcast-ready, consistent, and easy to trust. If you've been chasing that polished finish, the principles in this guide will get you closer, and this breakdown of better podcast sound is a strong companion if you want to sharpen your ear while you work.
The Difference Between Good and Unforgettable Audio
A lot of podcasts are good on paper. Smart host. Solid guests. Useful ideas. But unforgettable audio does something extra. It removes friction.
When a show is mastered well, the listener doesn't have to fight the sound. They're not reaching for the volume during a quiet answer or wincing when laughter spikes. They stay inside the conversation, which is exactly where you want them.
That's why mastering matters so much. It's the final layer of polish that takes an episode from “pretty decent” to “I'd happily binge this on a long drive.” At a high level, mastering is the discipline of preparing your finished audio so it translates cleanly across earbuds, car speakers, laptops, and smart speakers without feeling uneven or harsh.
Practical rule: Great podcast audio rarely sounds flashy. It sounds calm, controlled, and expensive.
The creators who stand out usually aren't doing one magical thing. They're stacking a lot of small decisions correctly, from recording clean source material to shaping tone, controlling dynamics, and finishing the file for distribution.
The Real Cost of Subpar Podcast Audio
Bad audio doesn't just sound amateur. It changes listener behavior.
When someone presses play on your episode, they make a judgment fast. If the voice sounds boxy, distant, noisy, or wildly inconsistent, they don't separate the message from the production. They fold it all together and decide whether your show feels worth their attention.
According to industry data, 68% of podcast listeners abandon episodes within the first minute if audio quality is poor, which makes consistent loudness and peak control critical for retention, as noted by B&H Photo's podcast mixing and mastering guidance.

What listeners hear before they hear your ideas
Most creators focus on content first, which makes sense. But listeners experience your work through sound, not through your outline. If your audio feels unstable, your authority feels unstable too.
A few common problems create that impression quickly:
- Inconsistent volume: One sentence lands softly, the next jumps out too hard, and the listener starts riding their volume control.
- Background distractions: HVAC hum, room rumble, traffic, and computer fan noise all compete with your voice.
- Harsh top end: Sibilance and brittle highs make longer listening sessions tiring.
- Muddy midrange: Too much buildup in the low mids can make even a sharp speaker sound muffled.
Poor production also creates hidden workload. A rough recording forces you into repair mode. You spend more time cutting noise, patching levels, and trying to rescue tone that should've been captured properly at the source.
Why this hits brand credibility
Podcasting is intimate. The audience places your voice directly in their ears. That means every technical flaw feels personal. Sloppy audio doesn't just suggest inexperience with gear. It suggests a lack of editorial care.
That matters whether you're a solo creator, a founder with a branded show, or a marketing team building thought leadership. The more premium your positioning, the less room you have for avoidable technical friction.
A polished voice track tells the listener that the host respects their time.
The creators who eventually go pro usually realize the same thing. The question isn't whether they can keep forcing a DIY setup to behave. The question is whether the time spent fighting the audio is helping the business. If you've been weighing that decision, this comparison of DIY versus professional podcasting frames the trade-offs clearly.
Build Your Sound From the Ground Up
If you want to master podcast audio well, start before the waveform exists.
Most audio problems are upstream problems. The room was too reflective. The mic position was off. The input gain was set with optimism instead of discipline. Once those mistakes are baked into the recording, every plugin becomes more of a compromise.
Start with the room, not the software
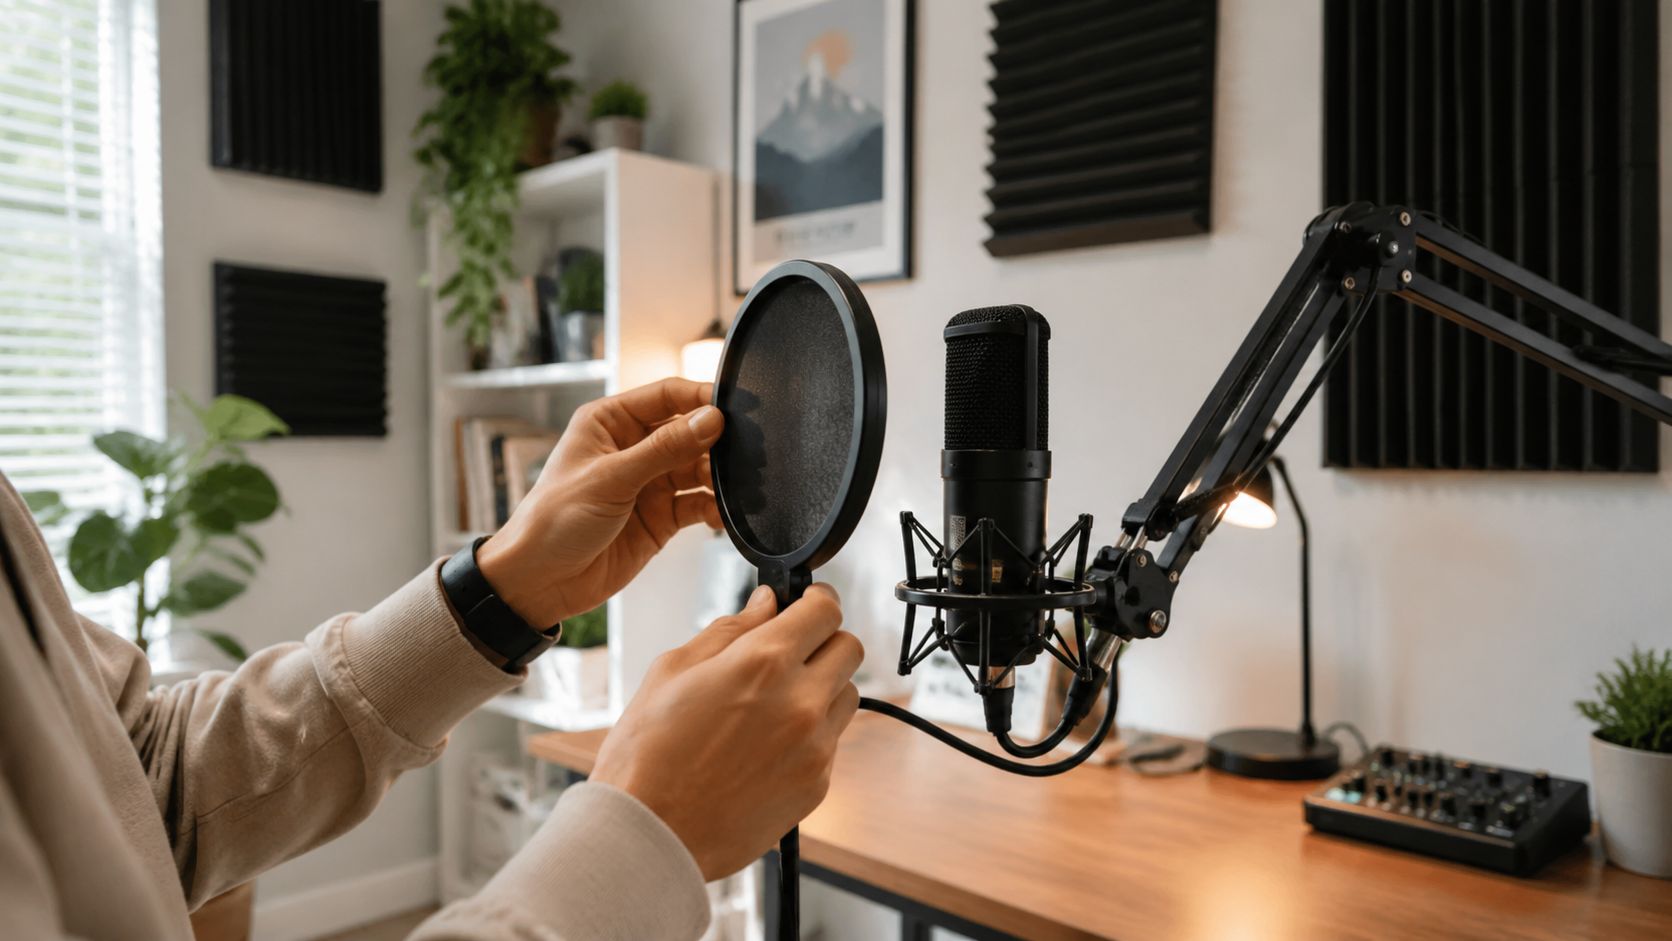
A reflective room makes even expensive microphones sound cheap. Bare walls, glass, and hard tabletops throw your voice back into the mic, which creates that hollow, splashy quality people often mistake for a mic issue.
You don't need a luxury buildout to improve this. You need control. Soft furnishings, acoustic panels, rugs, curtains, and careful positioning all help reduce reflections. The point is to hear more voice and less room.
A second issue is low-frequency junk. Spoken voice usually doesn't need what's happening deep below the useful vocal range, and unwanted rumble tends to collect there. A high-pass filter between 80 Hz and 100 Hz helps remove plosives and rumble that listeners don't need to hear, according to iZotope's podcast production guide.
Mic technique changes everything
A strong mic setup is less about owning the “best” microphone and more about using the one you have correctly.
Keep the capsule at a consistent distance. Use a pop filter. Speak slightly off-axis if your consonants are aggressive. Don't drift in and out during the conversation. If your mic technique is unstable, your editor has to solve a performance problem with processing, and that never sounds as natural as getting it right in real time.
Here's the simple version:
- Control distance: Stay consistent so your tone and level don't swing from sentence to sentence.
- Use the pop filter properly: It catches plosive blasts before they hit the diaphragm.
- Aim with intention: A small off-axis angle can soften harsh bursts without dulling the voice.
- Protect the performance: Encourage guests to sit still, avoid desk bumps, and keep jewelry or sleeves away from the mic stand.
Studio habit: The cleanest edit is the one you never have to make.
This is also where format discipline matters. For optimal results, record at 24-bit/48kHz in WAV or AIFF format, and set input levels to average around -20 dB during normal speaking so you keep headroom and avoid digital clipping, as explained in iZotope's recording recommendations.
Gain staging is where beginners usually get nervous
Many creators record too hot because they want the waveform to look “strong.” That's the wrong goal. You want a clean signal with room to move, not a waveform pressed against the ceiling.
A sensible input level gives you flexibility later when laughter gets louder, a guest leans in, or a conversation unexpectedly spikes. Once clipping happens, you can disguise it a little, but you can't restore what was lost.
If you produce interviews or branded shows, it helps to study polished multi-person workflows outside your niche. A good example is Busylike's Intel partnership, which is useful for seeing how serious production teams think about presentation, environment, and consistency when content has to represent a major brand.
After your recording setup is stable, this next resource on advanced recording techniques for stronger podcast sound is a practical next step.
A short visual walkthrough can also help lock in the fundamentals before you ever open your DAW.
Sculpting Your Voice with Editing and Mixing
Recording creates the raw material. Mixing shapes it into something intentional.
You clean the track, correct what distracts, and guide the voice into a more confident tonal space. Good mixing doesn't make a host sound fake. It makes the host sound like themselves on their best day.
Clean first, then enhance
Start with subtraction. Remove obvious mistakes, long pauses that kill pacing, mouth noise if it's distracting, and any consistent background noise you can manage transparently. If the room sound is uncontrolled, resist the temptation to over-process. Heavy-handed repair often sounds more distracting than the original issue.
Then handle the low-end clutter. A high-pass filter around 80 to 100 Hz is commonly used to remove rumble and plosive energy that spoken voice doesn't need. It's one of the fastest ways to clear space before you do more detailed EQ work.
The middle of the spectrum deserves restraint. Excessive EQ in the 300 to 1000 Hz area can make speech feel muffled, while not giving enough attention above 2 kHz can reduce intelligibility, based on the guidance in the B&H source cited earlier in this article.
EQ and compression should support the speaker
For vocal clarity, apply compression with a threshold between -10 dB and -16 dB to smooth dynamics. Use EQ to shape the voice, often boosting lower frequencies below 200 Hz while gently cutting harshness above 4,000 Hz, as described in Buzzsprout's podcast audio guidance.
That doesn't mean every voice wants the same treatment. A thin voice may welcome some weight. A naturally deep voice may need less added warmth and more cleanup in the low mids. A bright speaker might need de-essing instead of broad high cuts.
Here's a simple starting framework.
| Processor | Setting | Purpose |
|---|---|---|
| High-pass filter | 80 Hz to 100 Hz | Remove rumble and plosives |
| EQ | Boost below 200 Hz as needed | Add warmth to thinner voices |
| EQ | Gentle cut above 4,000 Hz when harsh | Reduce brittle top end |
| Compressor | Threshold between -10 dB and -16 dB | Smooth loud phrases |
| De-esser | Target sibilant range only | Control harsh “s” and “sh” sounds |
What works and what usually doesn't
Podcast mixing rewards subtle control. It punishes insecurity.
What tends to work:
- Gentle compression: Enough to catch loud passages without flattening personality.
- Targeted EQ moves: Small adjustments with a reason behind them.
- Selective de-essing: Fix sibilance where it lives instead of darkening the whole track.
- Context checks: Listen on headphones, speakers, and a phone to see if the voice still translates.
What usually doesn't:
- Over-compression: Ratios that are too aggressive can create pumping and unnatural breathing.
- Broad high cuts for sibilance: You lose air and intelligibility along with the harshness.
- Extreme low-mid boosts: The voice gets thick, then muddy.
- Mixing by sight: A pretty waveform doesn't guarantee a good listen.
“The best podcast mix sounds finished without sounding processed.”
If you want a stronger workflow after the edit, these post-production best practices for podcast episodes are worth studying.
The Pro Shortcut The Flexwork Advantage
There's a point in most creators' development where the issue stops being information.
You can watch the tutorials. You can buy the plugins. You can build a respectable signal chain at home. But if every episode still eats hours of setup, troubleshooting, cleanup, revisions, exports, and second-guessing, the bottleneck isn't knowledge alone. It's capacity.
DIY skill is valuable, but time has a cost
The deeper you go into podcast production, the more you see how many disciplines sit inside a polished episode. There's room acoustics, engineering, host coaching, editing judgment, mix translation, mastering standards, video capture, clip extraction, branding, and release operations.
That's manageable if production is the work. It becomes draining if production is standing in the way of the work you prefer to do, which might be hosting, selling, teaching, or building a media brand.
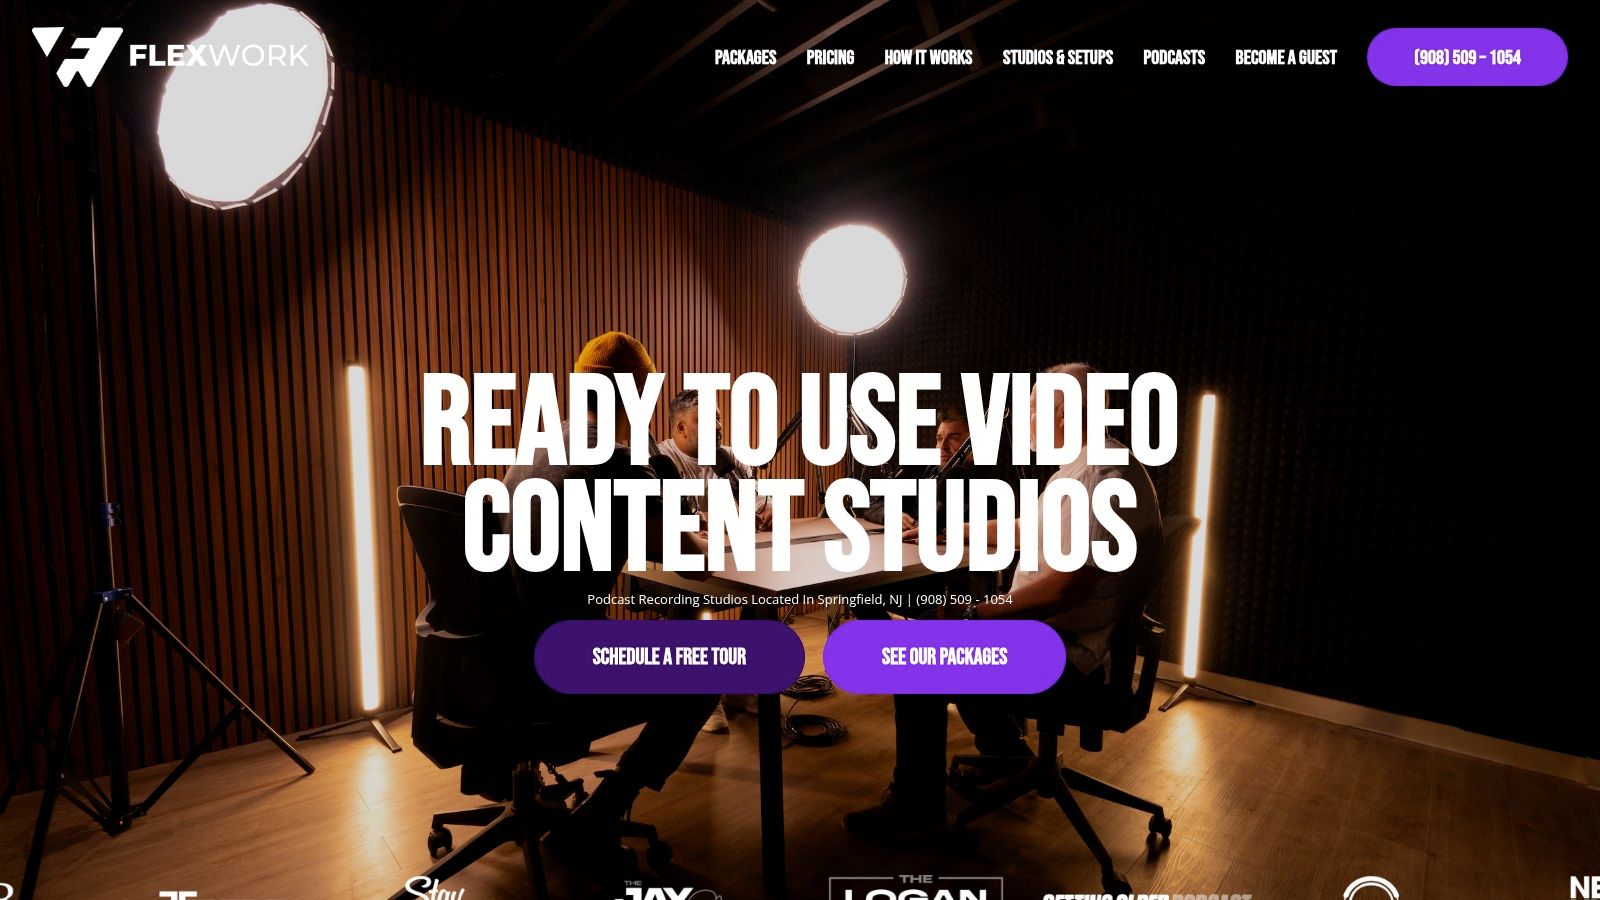
Professional support becomes the shortcut because it compresses the learning curve and reduces avoidable mistakes. A treated studio gives you cleaner source audio immediately. An experienced engineer hears problems before they become expensive. A production team protects consistency across episodes, which is where many solo creators gradually lose momentum.
Who should keep DIY and who should level up
DIY still makes sense when you're experimenting with format, testing your voice, or shipping early reps. It teaches discipline. It sharpens taste. It helps you understand what good production is doing.
But there's a moment when staying DIY becomes a tax.
That moment usually looks like this:
- You've outgrown your room: Your content deserves cleaner capture than your space can deliver.
- You're editing too much: Production is eating the hours meant for growth or client work.
- Your brand has become premium: The audio now has to match the business.
- You need repeatability: Every episode has to sound like it belongs to the same serious show.
For creators ready to move faster, a professional setup can handle the recording environment, engineering, editing, clip production, and growth infrastructure in one system. That matters even more if you're producing a full content ecosystem instead of a standalone audio file.
A concentrated production day is often the smartest play for busy founders and creators. Content Days are $3000/day and include 20 edited reels or 60 pro photos. If your show needs a stronger digital home, podcast websites are $5000 plus hosting. And for teams treating podcasting as a growth channel, the Market & Manage tier starts at $1500 per episode with a 20-episode growth commitment.
The right move isn't always “do it yourself better.” Sometimes it's deciding your time is better spent on the mic than behind the waveform.
The Final Polish Mastering for Distribution
Mixing gets the episode sounding right. Mastering gets it ready for the world.
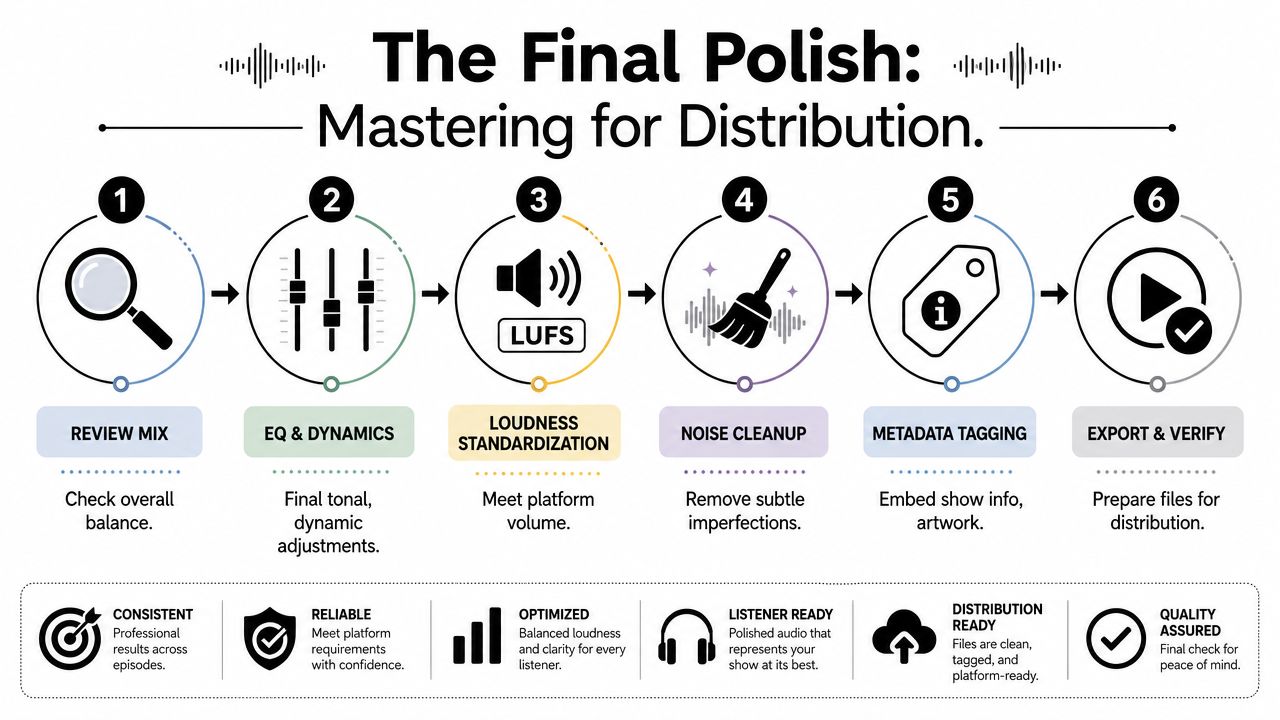
This is the final quality-control stage for your stereo file. You're no longer shaping one voice track in isolation. You're checking how the full episode behaves as a finished product, then bringing it to a distribution-ready loudness target so it plays back consistently across platforms and devices.
The loudness target that matters
The industry standard for podcast mastering is an integrated loudness of -14 dB LUFS with a True Peak ceiling of -1 dB. This prevents streaming platforms from turning your audio down and helps keep playback consistent for listeners, according to this podcast mastering explanation.
That target matters because loudness is no longer just a taste issue. Platforms normalize playback. If your file is pushed too hard, they'll reduce it. If your peaks aren't controlled, you risk distortion, especially after conversion to compressed formats.
A practical approach is simple. Use a loudness analyzer, set a limiter ceiling to -1 dB with True Peak enabled, and raise the gain gradually until the analyzer reads -14 dB LUFS integrated. That's the move that turns a finished mix into a distribution-ready master.
A clean mastering workflow
Mastering doesn't need to be mystical. It needs to be disciplined.
Try this checklist:
- Review the final mix: Listen for clicks, uneven edits, music transitions, and tonal imbalances.
- Check overall dynamics: The episode should feel controlled, not flattened.
- Set your limiter correctly: Ceiling at -1 dB with True Peak on.
- Measure, don't guess: Use a loudness meter and aim for -14 dB LUFS integrated.
- Export and verify: Listen to the rendered file on more than one playback system.
Final pass: If the master sounds louder but less comfortable, you didn't improve it. You just reduced its margin for error.
Once the audio is ready, the smart creators think past the RSS feed. A polished show also needs a release system, especially if you're cutting promo assets and supporting each episode with short-form marketing. If you need help organizing that side of the operation, this guide to social media content scheduling is a useful companion to the production workflow.
For creators still building their toolkit, a roundup of free podcast editing software options can help you practice the process before you scale it.
Mastering is often the last ten percent of the work, but it's the part listeners feel immediately. It's the difference between a file that merely uploads and a file that sounds ready to represent you anywhere.
If you're ready to stop wrestling with your setup and start releasing episodes that sound polished from the first second, Flexwork Podcast Studios is built for that next step. Book a tour, explore the production packages, or lock in a studio session and give your show the sound your brand deserves.