

Video Editing for Reels That Actually Convert in 2026
 August 27, 202623 Minutes
By 2026, Instagram Reels accounts for 50% of all time spent on Instagram, up from 37% in 2024, while Reels and Facebook Reels together play more than 200 billion times daily across Meta platforms, according to short-form video data from Kapwing. That scale has changed the editing brief. A reel can't just look polished. It has to earn attention immediately, communicate without friction, and fit the viewing behavior of each platform.
This guide treats video editing for reels as a retention discipline rather than a collection of visual effects. You'll learn how to select footage, build the first seconds, shape pacing, design captions and sound, export for multiple destinations, and turn one studio session into a reliable library of finished content. Flexwork Studios supports that workflow with studio rentals, production packages, Content Day sessions, and post-production services for creators and podcast teams that need consistent output without sacrificing craft.
Why Most Reels Underperform Before the Edit Even Starts
A reel often loses its audience before the first cut is made. The opening frame may be vague, the speaker may take too long to reach the point, or the footage may offer no clear visual change. Editing can reduce those problems, but it can't manufacture a strong premise from footage that was never planned around one.
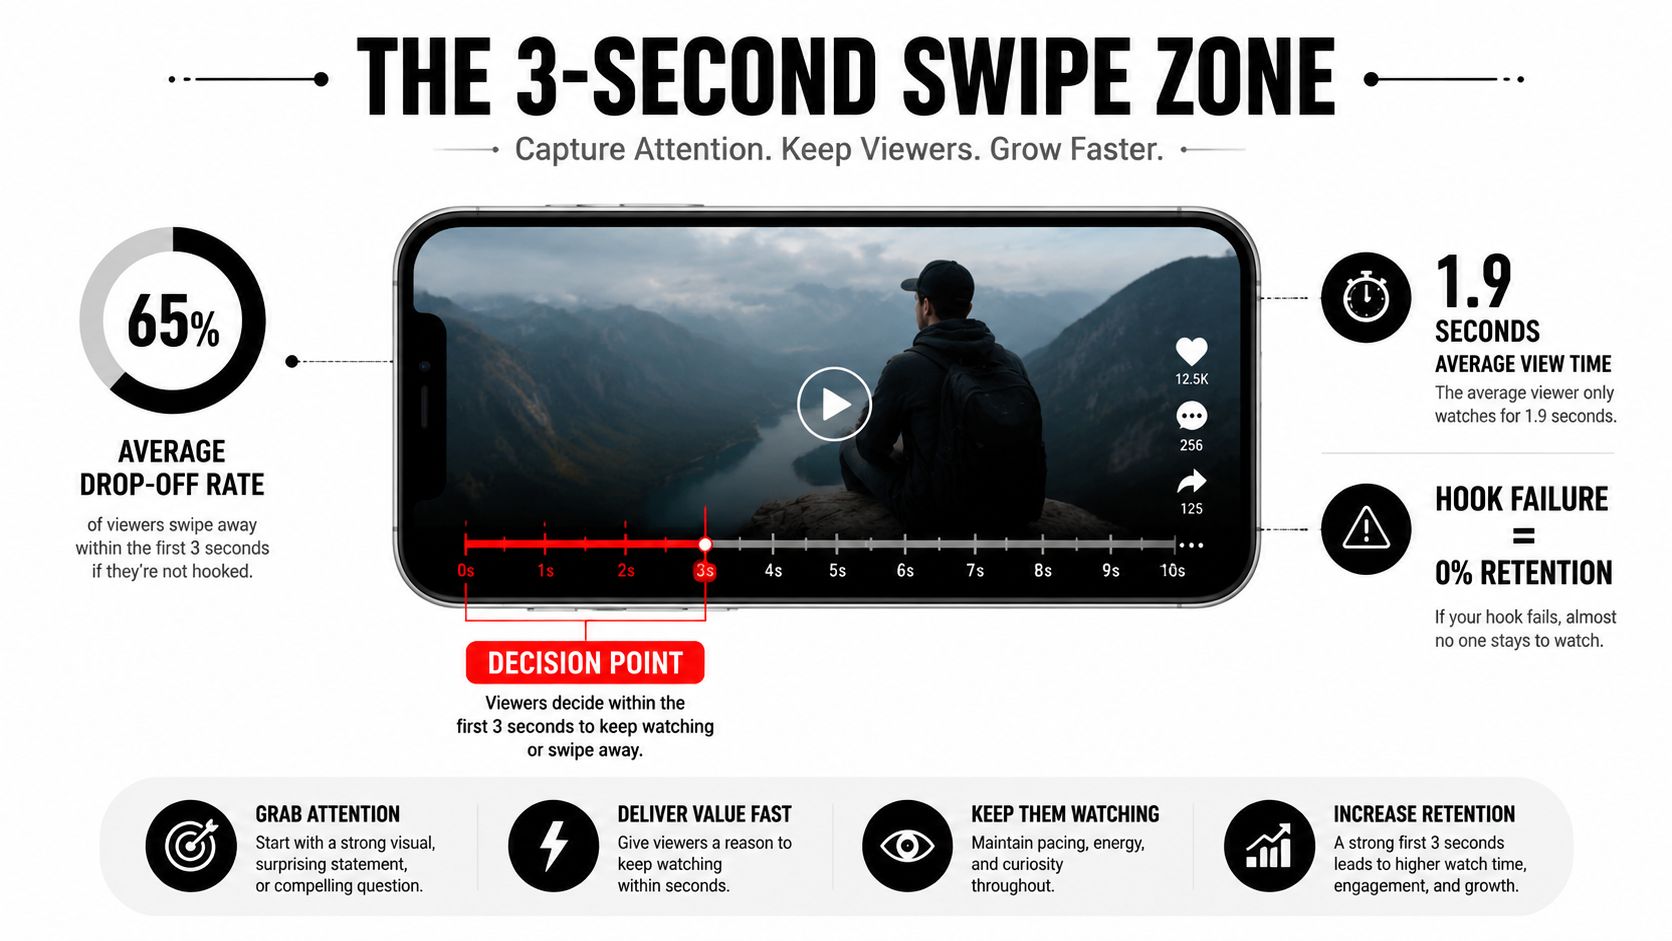
The first three seconds function as the critical funnel. For 15 to 30 second clips, one benchmark framework places a swipe-away rate below 25% in the exceptional range, 25% to 40% as good, and 40% to 60% as average, as outlined by OpusClip's retention guidance. Those figures make the opening a production decision, not a finishing touch.
The hook starts with the source material
A strong hook gives the viewer a reason to stay before context arrives. That might be a surprising statement, a visible transformation, a sharp question, or the answer to a problem the audience already recognizes. A weak hook usually sounds like an introduction, a greeting, or a long explanation of what the viewer is about to hear.
The footage also needs a readable frame. In vertical viewing, the subject should be easy to identify immediately, with enough contrast and movement to survive small-screen playback. If the speaker is visually buried, the editor is forced to compensate with oversized captions, aggressive crops, or distracting effects.
Practical rule: Cut toward the moment that creates curiosity, not the moment that begins the conversation.
The short-form video trends guide from Flexwork Studios is useful for understanding the broader environment, but trend awareness shouldn't replace editorial judgment. A fast transition may attract attention for a moment. A clear promise gives the viewer a reason to continue.
Flexwork Studios approaches the production side of this problem by capturing podcast and video content in a controlled studio environment, where framing, lighting, sound, and multiple angles can support consistent reel output. The editor's job becomes more powerful when the source footage already contains clean choices.
The rest of the workflow should answer one question repeatedly: does this decision make the next moment easier to watch? If it doesn't clarify the idea, strengthen the emotion, or refresh the visual field, it probably doesn't belong in the cut.
Choosing the Right Shots Before You Touch the Timeline
Raw footage rarely cuts itself. A long interview may contain useful statements, but the strongest sentence could sit between pauses, repeated takes, or several similar camera angles. Opening the timeline and dragging clips around without a selection pass turns editing into guesswork.
Start by reviewing every usable moment away from the final sequence. Tag clips according to three practical criteria: hook strength, emotional movement, and visual variety. A clip can be technically clean and still fail because the speaker sounds uncertain, the point takes too long to arrive, or the frame looks identical to everything around it.
Build a ruthless selection pass
The first pass should answer whether each shot earns attention. Look for:
- A clear subject: The viewer should know who or what matters without decoding the frame.
- A strong opening image: The first frame should carry information, tension, personality, or movement.
- A clean audio signal: Speech must remain understandable before music or sound design enters.
- Intentional movement: A gesture, camera change, demonstration, or motivated action can refresh attention.
- An emotional peak: Surprise, conviction, humor, concern, or enthusiasm gives the viewer a reason to remain involved.

Reject filler B-roll that only covers a cut but contributes no meaning. A hand touching a microphone, a generic laptop shot, or a slow room pan may look refined in isolation, yet these images often interrupt the argument instead of supporting it. Keep B-roll when it demonstrates the point, changes the viewer's understanding, or creates a deliberate emotional beat.
Read the retention ceiling in the material
For short-form video under 15 seconds, Retensis recommends average retention above 60% as a practical benchmark, with above 75% considered strong and above 85% often indicating looping behavior. For clips between 15 and 30 seconds, the target moves above 50%, while clips between 30 and 60 seconds use above 40% as a baseline target.
Those benchmarks don't tell you which exact shot to choose, but they clarify the consequence of weak selection. If the clip has no strong opening, no visual change, and no meaningful midpoint, the retention curve has little support. Adding more effects won't solve that structural problem.
When two takes deliver the same information, choose the one with greater conviction or cleaner facial expression. When two angles feel equally strong, use the angle that gives the next cut more contrast. Shot selection sets the ceiling. Timeline technique can refine the material, but it can't raise a ceiling created by repetitive or hesitant footage.
For teams producing interview-based content, Flexwork's short-form video production service can support this selection process with footage captured specifically for vertical clips, rather than forcing every reel out of a single static composition.
The Assembly Workflow That Turns Footage Into a Reel
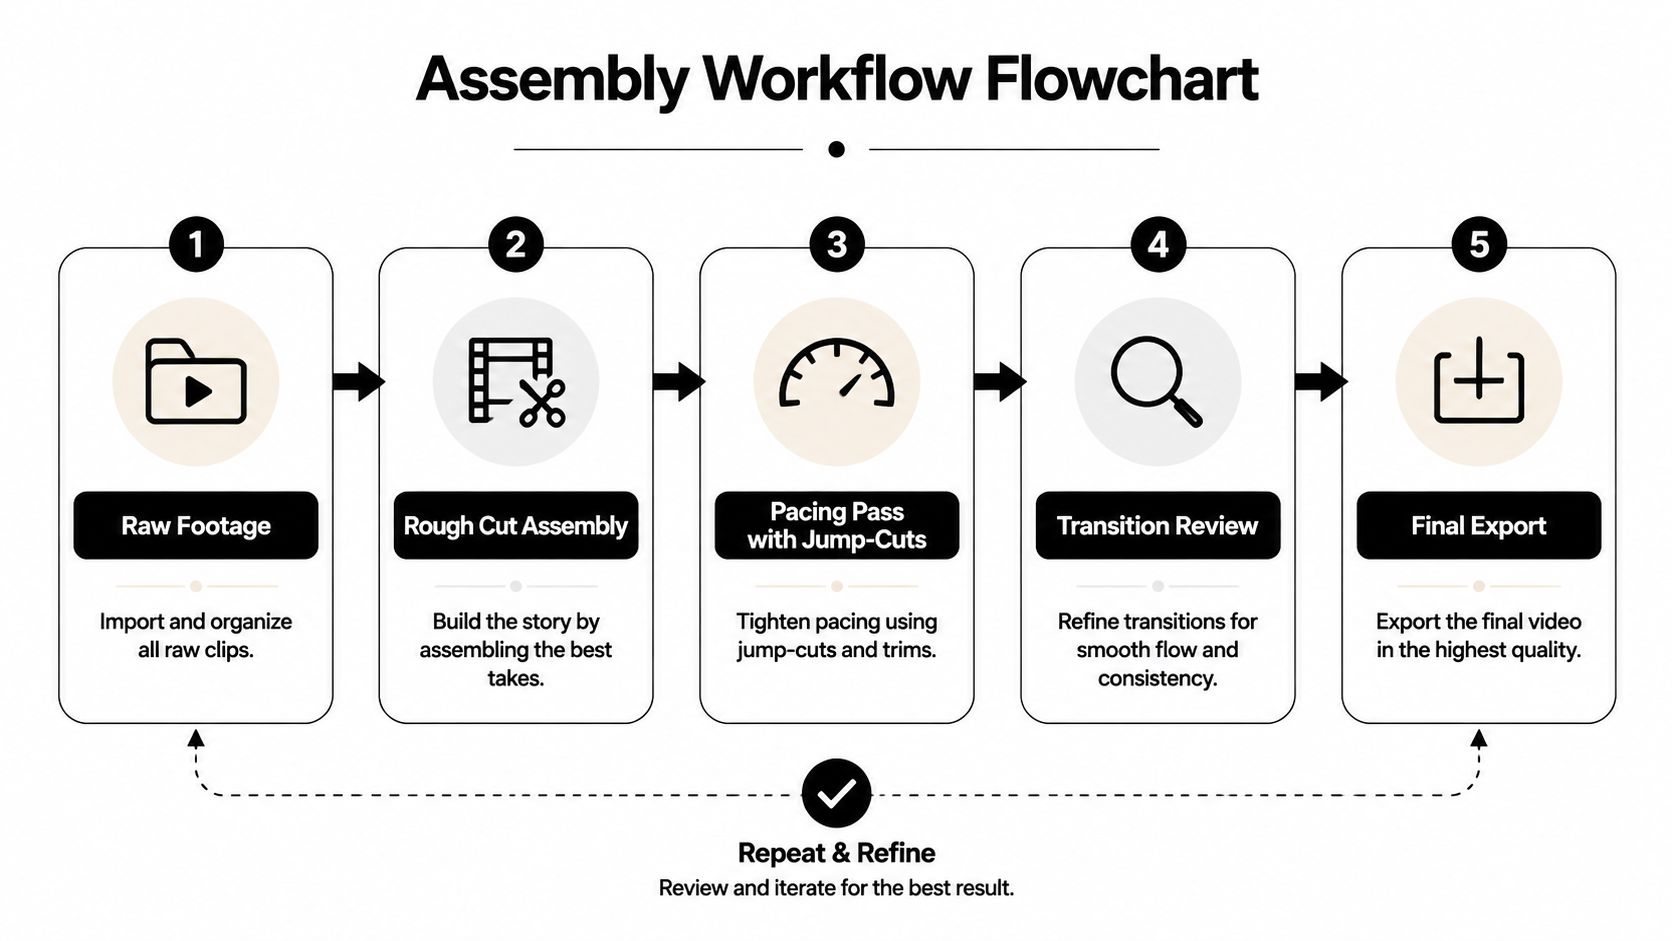
A working assembly begins with the hook, not the chronological order of the conversation. Pull the strongest sentence or visual moment into the opening, then build enough context behind it to make the statement understandable. The edit should feel immediate without becoming confusing.
The rough cut is where the story arc takes shape. Place the core statement first, identify the supporting explanation, and finish with either a useful resolution or a line that naturally invites the next thought. Don't polish captions or transitions while the structure is still unstable. A beautiful version of the wrong story is still the wrong reel.
Let every cut earn its timing
Once the arc works, tighten the performance. Remove greetings, repeated phrases, empty breaths that don't create anticipation, and pauses that make the viewer wait without receiving information. Jump cuts work when they preserve the speaker's energy and remove friction. They fail when every cut lands at the same visual scale or makes the speaker appear unnaturally restless.
Use a hard cut when the idea changes, the expression shifts, or the next shot provides a clear contrast. A whip transition can earn its place when the camera movement motivates it. A match cut works when shape, gesture, or composition connects the two shots. If a transition exists only to demonstrate editing skill, it's probably slowing the message.
Overlays and split screens are useful when they carry information at the same time as the speaker. A product detail, reaction, screen recording, or supporting visual can keep the frame active while the voice continues. Don't add visual layers just because the timeline feels empty.
Shape the midpoint and the final frame
Pacing isn't the same as cutting constantly. It means managing the rate at which the viewer receives new information. A clip can use longer shots when the speaker delivers a strong emotional beat, then accelerate when the argument becomes denser or the visual subject changes.
The midpoint deserves a deliberate refresh. Reintroduce movement, change the crop, bring in a supporting image, or reveal a new piece of information before attention decays. End quickly once the promise is fulfilled. A natural loop can work well when the final motion or phrase connects back to the opening, but don't force a loop that makes the conclusion unclear.
For teams that need an outside benchmark for finishing standards, professional reel editing services can be a useful reference when evaluating pacing, captions, and platform-ready delivery. Flexwork's video editing workflow follows the same core principle: the final cut should feel intentional at every point, not merely busy.
Captions, Sound, and On-Screen Text That Carry the Message
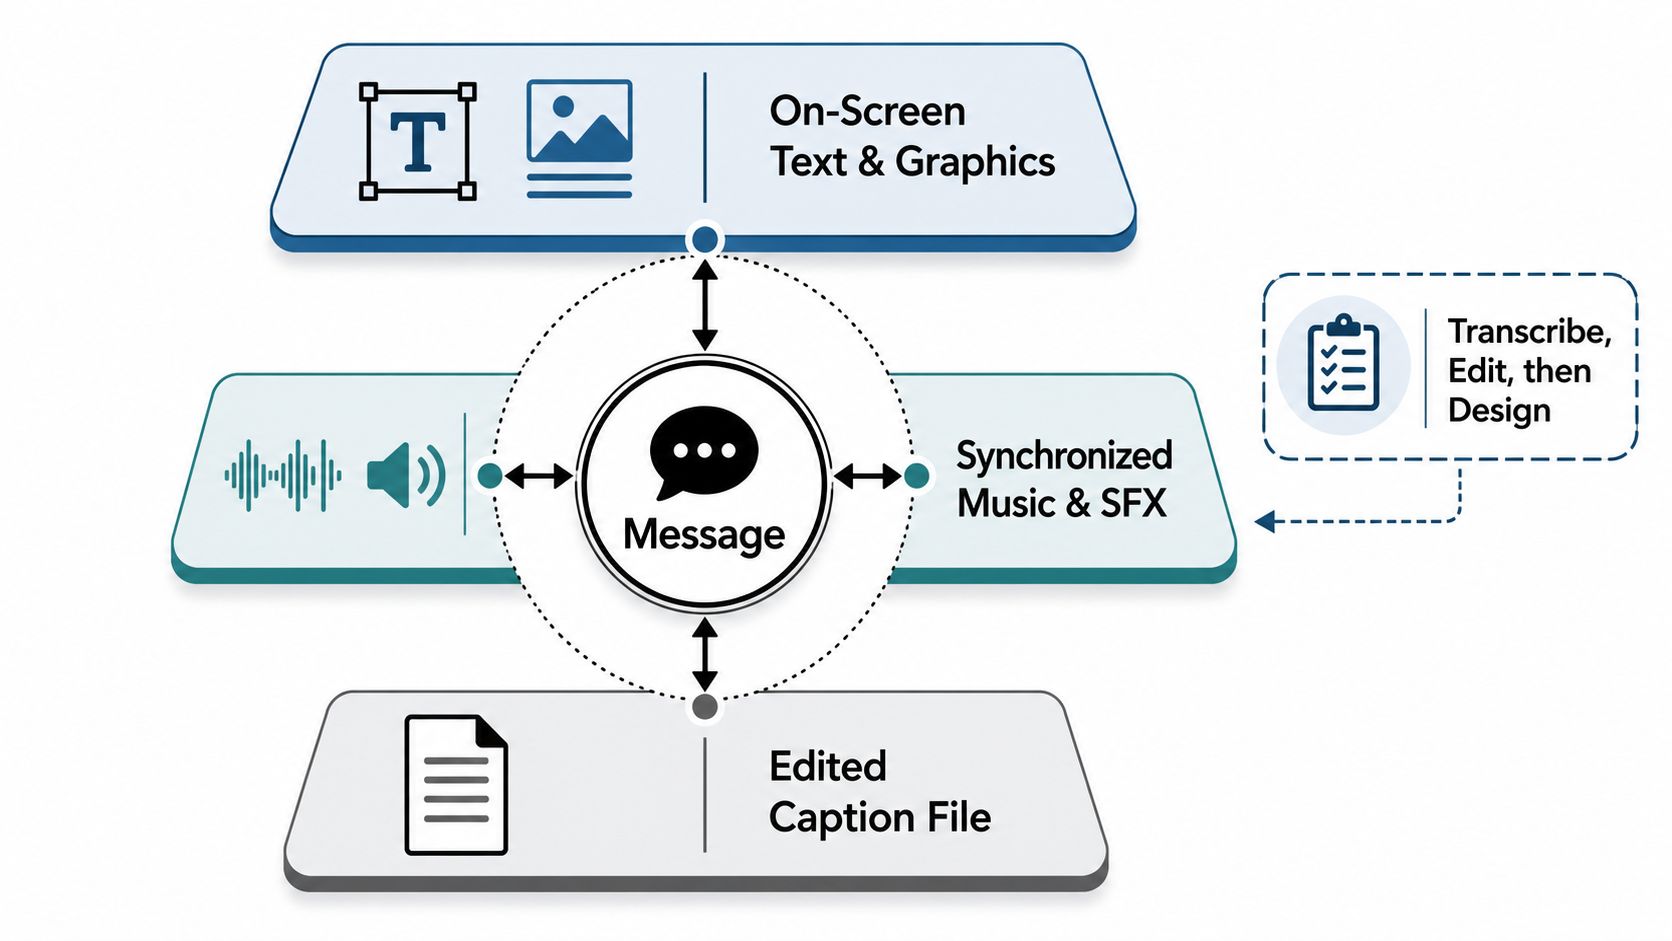
Captions, music, and graphics shouldn't be treated as separate layers added after the edit. Together, they determine how quickly a viewer understands the reel, especially during silent autoplay or distracted viewing.
Begin with the spoken transcript, then edit the caption file for readability. Break phrases according to natural speech and visual rhythm, not arbitrary sentence boundaries. Pull a key word or short phrase onto its own beat when that emphasis helps the viewer understand the argument.
Design for comprehension first
Sync text changes with a cut, gesture, reveal, or B-roll shift whenever possible. A caption that changes halfway through an otherwise static sentence feels mechanical. A caption that lands with a visual event gives the viewer two reinforcing signals.
Keep the hierarchy restrained. Two font weights are usually enough to separate the main statement from supporting words. Text should remain readable against the frame without covering the speaker's face or competing with platform interface elements. Every graphic needs a job, whether that's naming a concept, clarifying a number, or directing attention to a visual detail.
Build sound around the voice
Set the spoken track as the anchor. Music should support the emotional temperature without competing with consonants or changing the perceived authority of the speaker. Subtle foley and restrained whooshes can make a cut feel physical, but stacking multiple trend sounds over dialogue usually creates clutter.
A short breath or moment of silence before a new thought can create anticipation. Don't remove every pause automatically. Some pauses make the following line feel more deliberate, while others drain momentum.
The audio mixing techniques from Flexwork Studios offer a useful production reference for balancing voice, music, and effects. The same logic applies inside a reel: the message stays in front, and the sound design makes it easier to feel and follow.
Platform-Specific Export Settings for Instagram, TikTok, and Shorts
Create one high-quality master before making platform versions. That master should preserve the cleanest image, the most flexible framing, and the final approved caption and sound decisions. Adapt the delivery file afterward instead of rebuilding the edit from scratch for every destination.
Instagram Reels are designed for vertical full-screen viewing, with the commonly recommended production format set at 1080 by 1920 pixels in a 9:16 aspect ratio, as detailed by Vista Social's Instagram Reels dimensions guide. Reels can now run for up to 3 minutes, according to Hootsuite's updated Instagram Reels length guidance. That expanded limit doesn't mean every reel should be longer. Duration should follow the strength of the idea and the editor's ability to sustain attention.
| Spec | Instagram Reels | TikTok | YouTube Shorts |
|---|---|---|---|
| Source format | 1080 × 1920, 9:16 vertical master | Adapt the same 9:16 vertical master | Adapt the same 9:16 vertical master |
| Length approach | Up to 3 minutes, but use only the time the idea earns | Select a duration that supports the hook and payoff | Select a duration that resolves the idea cleanly |
| Frame safety | Keep faces and essential text away from interface areas | Review captions and buttons after upload | Review title and interface overlays after upload |
| Frame rate | Match the source footage and review motion after compression | Match the source footage, with 30fps often a clean practical choice | Higher frame rates can suit smoother motion |
| Delivery workflow | Export a clean master, then upload natively | Upload without another platform watermark | Upload the platform-specific version |
| Backup format | Keep a square 1080 × 1080 version for non-vertical feeds | Keep the same square backup when needed | Keep the same square backup when needed |
The table is a working decision aid, not a substitute for reviewing the uploaded file. Compression can soften gradients, shift skin tones, or make small captions difficult to read. Watch the final export on a phone before publishing.
For scheduling and approval workflows, iHatePosting's guide to scheduling Instagram posts and Reels can help teams organize publishing after the edit is complete.
Scaling Reel Output Without Burning Out
The recurring bottleneck isn't usually a lack of ideas. It's the editing tax attached to every individual reel. Selection, assembly, captions, sound, revisions, exports, and approvals can turn a simple clip into a daily interruption that prevents creators from scripting the next episode or serving clients.
A pipeline solves the problem by separating capture from delivery. Instead of opening a new project every time inspiration strikes, plan a concentrated production session with a hook list, controlled lighting, clean audio, multiple angles, and a defined post-production handoff.
Compare labor with the library you need
A DIY workflow can consume several hours per reel once every stage is included. At a three-hour working assumption, twenty reels represent 60 hours of creative labor, calculated as 20 reels multiplied by three hours. That calculation uses the production scenario described here, not an industry-wide benchmark.
Flexwork's Content Day package is priced at $3,000 per day and includes 20 edited reels or 60 professional photos, according to the stated service pricing. The value isn't only the number of deliverables. A studio-led session can also reduce context switching, preserve visual consistency, and give the team a complete library to review and schedule.
Production insight: Batch the decisions that require creative focus, then reuse the systems that don't.
A Content Day works best when the team arrives prepared. Write several hook variations, identify the audience problem behind each clip, and decide which ideas need a second camera angle or supporting demonstration. Capture alternate openings while the set, lighting, and audio are already active.
That approach changes editing from a series of emergencies into an operating rhythm. The content creator tools guide from Flexwork Studios can help teams organize the surrounding workflow, but tools won't replace a clear shot list or a disciplined approval process.
Turn This Workflow Into a Repeatable Content Engine
A repeatable reel workflow becomes a competitive asset when it protects the creator's attention. The goal isn't to produce more noise. It's to extract more useful distribution from footage that already reflects the brand, the host, and the point of view.
The engine rests on three decisions. First, lock a shot-list template that defines the hook, supporting angle, visual change, and closing line before anyone enters the studio. Second, edit a vertical master once, then adapt the delivery for each platform instead of making disconnected versions. Third, maintain a reusable library of caption treatments, sound textures, graphic styles, and approved brand language.
Make consistency easier than improvisation
A good template doesn't make every reel identical. It creates enough structure that the team can spend its creative energy on the idea. Rotate framing, vary the emotional temperature, and change the visual proof, while keeping the core production standards stable.
A studio-led Content Day creates the conditions for that system to work. Flexwork Podcast Studios offers controlled podcast and video spaces, professional capture, edited vertical content, and production support for teams building a consistent short-form library. The facility can also support podcast production packages, studio rentals, Content Day sessions, and podcast websites for creators who need the workflow to extend beyond individual clips.
The payoff is practical: more reach from the same footage, less creator fatigue, and a content calendar that compounds through consistent publishing. When every shoot produces material that can be selected, edited, captioned, exported, and scheduled through the same process, the team stops treating reels as isolated projects.
The right question isn't whether a reel has enough effects. Ask whether the production system can repeatedly deliver a clear hook, a strong visual sequence, readable message design, and a clean platform-ready export. That is the craft advantage behind sustainable video editing for reels.
Flexwork Podcast Studios provides acoustically treated studio rentals, Content Day sessions, podcast production packages, video editing, and social-ready reel production for creators and teams in the New Jersey and New York metro area. Visit Flexwork Podcast Studios to explore the studio, schedule a tour, and start planning a session that turns one focused production day into a finished reel library.