Essential Podcast Setup for Beginners: 2026 Guide
Meta description: Build a podcast setup for beginners that sounds professional. Learn the gear, acoustics, workflow, and when a studio saves time and quality.
URL slug: /podcast-setup-for-beginners
Primary keyword: podcast setup for beginners
Secondary keywords: beginner podcast equipment, podcast room acoustics, podcast workflow
A lot of first-time hosts start the same way. A mic tab is open in one browser window, YouTube reviews are playing in another, and the plan sounds simple enough: record from home, clean it up later, publish by next week.
Then reality shows up.
The room sounds hollow. The laptop fan creeps into the recording. Your voice changes every time you shift in your chair. What felt like a smart, lean setup starts eating hours you thought would go into actual content. For ambitious founders, coaches, creatives, and operators, that's the primary beginner trap. It's not a lack of talent. It's building a show on a weak recording environment and an even weaker workflow.
A strong podcast setup for beginners starts earlier than most gear guides admit. It starts with the room, the process, and the decision to remove friction before it slows your momentum.
Why Your 'Good Enough' Podcast Setup Is Holding You Back
You block off an hour to record. Fifteen minutes in, you are still adjusting input levels, closing noisy apps, and wondering whether the room echo will be fixable later. That is the fundamental beginner setup problem. It rarely starts with a bad microphone choice. It starts with a recording system that was assembled for convenience, not consistency.
Podcasting is mature enough now that listeners know what professional audio sounds like. Pew Research documented the medium's early growth in the US after Apple added podcasts to iTunes, showing how quickly audience adoption moved from niche to mainstream (Pew Research on podcasting's early growth). Edison Research's latest Infinite Dial reports that podcast listening is now a regular habit for a large share of Americans 12 and older (Edison Research Infinite Dial 2025).
Low friction to publish does not create low expectations from listeners.
The audience judges the production first
Before a listener decides whether your ideas are sharp, they hear the room, the gain staging, the pacing, and the edits. If the audio is hollow, uneven, or distracting, your credibility drops before your argument has a chance to land.
For a business podcast, that affects more than the episode. It affects the brand behind it.
I have seen strong hosts lose momentum because they treated production problems as small annoyances. They are not small. A noisy recording tells the audience you were willing to publish without control over the basics.
Poor production makes the show feel underprepared, even when the thinking is strong.
The real cost is workflow drag
A weak setup creates two forms of friction at once. The first is acoustic. The second is operational.
Acoustic problems are obvious once you know what to hear. Reflections off walls, desk slap, HVAC noise, laptop fans, and inconsistent mic distance all get printed into the file. Workflow problems are quieter, but they do just as much damage. You spend time testing, restarting, renaming files, chasing plug-ins, fixing avoidable mistakes, and second-guessing whether the episode is ready to publish.
That is where many beginner shows stall. Recording starts to feel heavier than it should.
Studios like Flexwork solve both problems in one move. The room is controlled before you walk in, and the process is built for repeatable sessions instead of one-off improvisation. If you are still recording at home, it helps to understand how room soundproofing and acoustic treatment affect spoken-word recordings so you can hear why "good enough" usually is not.
Where beginner setups break down
The pattern is predictable:
- The room works against the mic. Bare walls, reflective desks, and open corners make voices sound distant and thin.
- Monitoring happens too late. Problems get discovered after the session, when fixes are slower and more expensive.
- Mic technique changes constantly. A host leans back, turns away, or drifts off axis, and the voice loses stability.
- The workflow lives in too many places. Recording, editing, approvals, publishing, and promotion all depend on separate tools with no repeatable system.
None of this means beginners need a massive production budget. It means a professional sound comes from control, not from collecting gear.
That distinction matters. A creator with a modest mic in a treated room and a clean workflow will usually sound more credible than a creator with expensive gear in a noisy space and a messy process.
Master Your Sound Before You Spend a Dollar on Gear
A first recording session often goes like this. The mic arrives, the levels look fine, the conversation feels strong, and playback still sounds flat, roomy, and farther away than it felt in the moment.
The room caused most of that.

Why the room shapes your sound more than the mic
Beginner guides usually start with shopping lists. That is useful up to a point, but spoken-word recording is less forgiving than people expect. A microphone does not create polish on its own. It captures whatever is in front of it, including hard reflections from walls, desk bounce, window glare, and low mechanical noise you stopped noticing ten minutes ago.
That is why two creators can use similar gear and get very different results. One records in a soft, controlled space and sounds focused. The other records in a reflective room and sounds distant, even on a better microphone.
If you want a practical gear overview, Podmuse podcast equipment recommendations are a helpful starting point. Just keep the order right. Fix the room first, then choose equipment that fits it.
The fastest acoustic gains come from changing the space
You do not need a full renovation. You need fewer reflective surfaces near the mic and fewer noise sources competing with the voice.
A home setup usually improves fast when you make a few physical changes:
- Record in a smaller, softer room: Bedrooms, carpeted offices, and spaces with curtains usually beat kitchens and open living rooms.
- Reduce hard surfaces near the mic: Glass desks, bare walls, and empty corners throw reflections back into the capsule.
- Place absorption close to the speaking position: A thick curtain, moving blanket, or dense furnishing near the mic does more than random foam across the room.
- Remove repeatable noise: Fans, HVAC, laptop cooling noise, chargers, and street-facing windows all show up faster than beginners expect.
For a more practical breakdown, Flexwork's guide on how to soundproof a room for podcast recording explains what works and what usually wastes money.
One quick test works well. Clap once and listen to the decay. If the room answers back with a sharp flutter or bright ring, your voice will pick that up too.
Mic technique still decides whether the voice sounds stable
Good acoustics help, but inconsistent mic technique can still make an episode sound uneven. Hosts drift back in their chair, turn toward a guest, glance at notes, and let the level change every few seconds. That does not read as professional.
Keep the mic close. Keep your mouth at a consistent distance. Aim slightly across the mic instead of directly into it so plosives stay under control. Those small habits matter more than beginners think, especially on long-form interviews where tonal consistency carries the whole show.
I usually tell new hosts to protect consistency before chasing character. A slightly plain recording that stays clear and even is easier to publish than a stylish setup that changes every time the host moves.
A studio solves in one session what home setups keep trying to patch
DIY treatment can get a show off the ground. It also takes trial and error, and trial and error usually happens on episodes you planned to release.
A professional room removes that friction immediately. The acoustics are controlled, the mic chain is set correctly, monitoring happens in real time, and someone catches problems before they become editing work. Flexwork does more than provide a nicer room. It gives creators a repeatable recording environment, which is what makes a show sound credible across every episode, not just one good day.
That is the beginner shortcut. Better sound comes from control and repeatability long before it comes from owning more gear.
Choosing Your Starter Kit From DIY to Done-For-You
Starter gear should match the way you plan to record, publish, and stay consistent for the first 10 episodes.
That is the mistake I see most often. A founder buys a setup built for a future studio show, then records in a spare room twice a month and spends more time troubleshooting than speaking. A smaller kit often produces better results because it creates fewer chances to get distracted, misconfigure something, or delay release day.

A simple comparison
| Setup tier | What it includes | What works well | What starts to break |
|---|---|---|---|
| Scrappy starter | USB mic, wired headphones, laptop | Solo episodes, simple remote interviews, low cost entry | Limited control, room issues still matter |
| Savvy mid-tier | XLR mic, audio interface, studio headphones, basic treatment | Better gain control, cleaner monitoring, room to grow | More cables, more setup time, more points of failure |
| Professional package | Treated room, pro audio chain, engineered session, optional multicam | Consistency, speed, broadcast-ready capture | Less DIY ownership, more dependence on booking sessions |
The scrappy starter
A USB mic, closed-back headphones, and a reliable laptop are enough to start if your format is simple and your recording habits are disciplined. This tier suits solo episodes, coaching content, and straightforward interviews where speed matters more than customization.
The trade-off is control. You can get publishable audio, but you have fewer ways to shape tone, route multiple microphones, or recover from setup mistakes. If you go this route, keep the chain lean and learn it well.
If you want a broader shopping reference before deciding, these Podmuse podcast equipment recommendations are a practical companion to compare categories and trade-offs.
The savvy mid-tier
The mid-tier setup is where many creators overspend. An XLR mic and interface can sound better and give you cleaner gain staging, but only if you are ready to manage the extra steps that come with them. You need to understand levels, headphone monitoring, input routing, and basic session prep before each recording.
That added control helps when your show includes regular guests, co-hosts, or a production plan that is getting more demanding.
It also creates more failure points. Bad cable connections, wrong interface settings, missed sample-rate changes, and poor monitoring can eat a recording day fast. For creators who enjoy production, that is part of the craft. For creators focused on content and client-facing work, it becomes operational drag.
The done-for-you route
Done-for-you works best for ambitious hosts who care about quality, but do not want their growth bottlenecked by setup time. You are not buying objects. You are buying repeatability, speed, and a cleaner path from recording to release.
Flexwork's guide to the best podcast equipment for beginners is useful if you are still deciding what belongs in a home rig, but many creators are better served by skipping the trial-and-error phase and recording in a studio from day one. That decision solves two beginner problems immediately. The room is handled, and the workflow is tighter.
Choose the done-for-you route if:
- Your brand needs to sound established from episode one
- You are recording guest interviews, roundtables, or video clips
- You want sessions to run on schedule
- You would rather invest in output than in testing gear combinations
I usually frame the choice this way. If production is part of your hobby, build the rig. If the podcast is part of your business, use the setup that gets professional results with the least friction. Flexwork fits that second path well because it removes both acoustic guesswork and workflow waste, which is what beginners struggle with first.
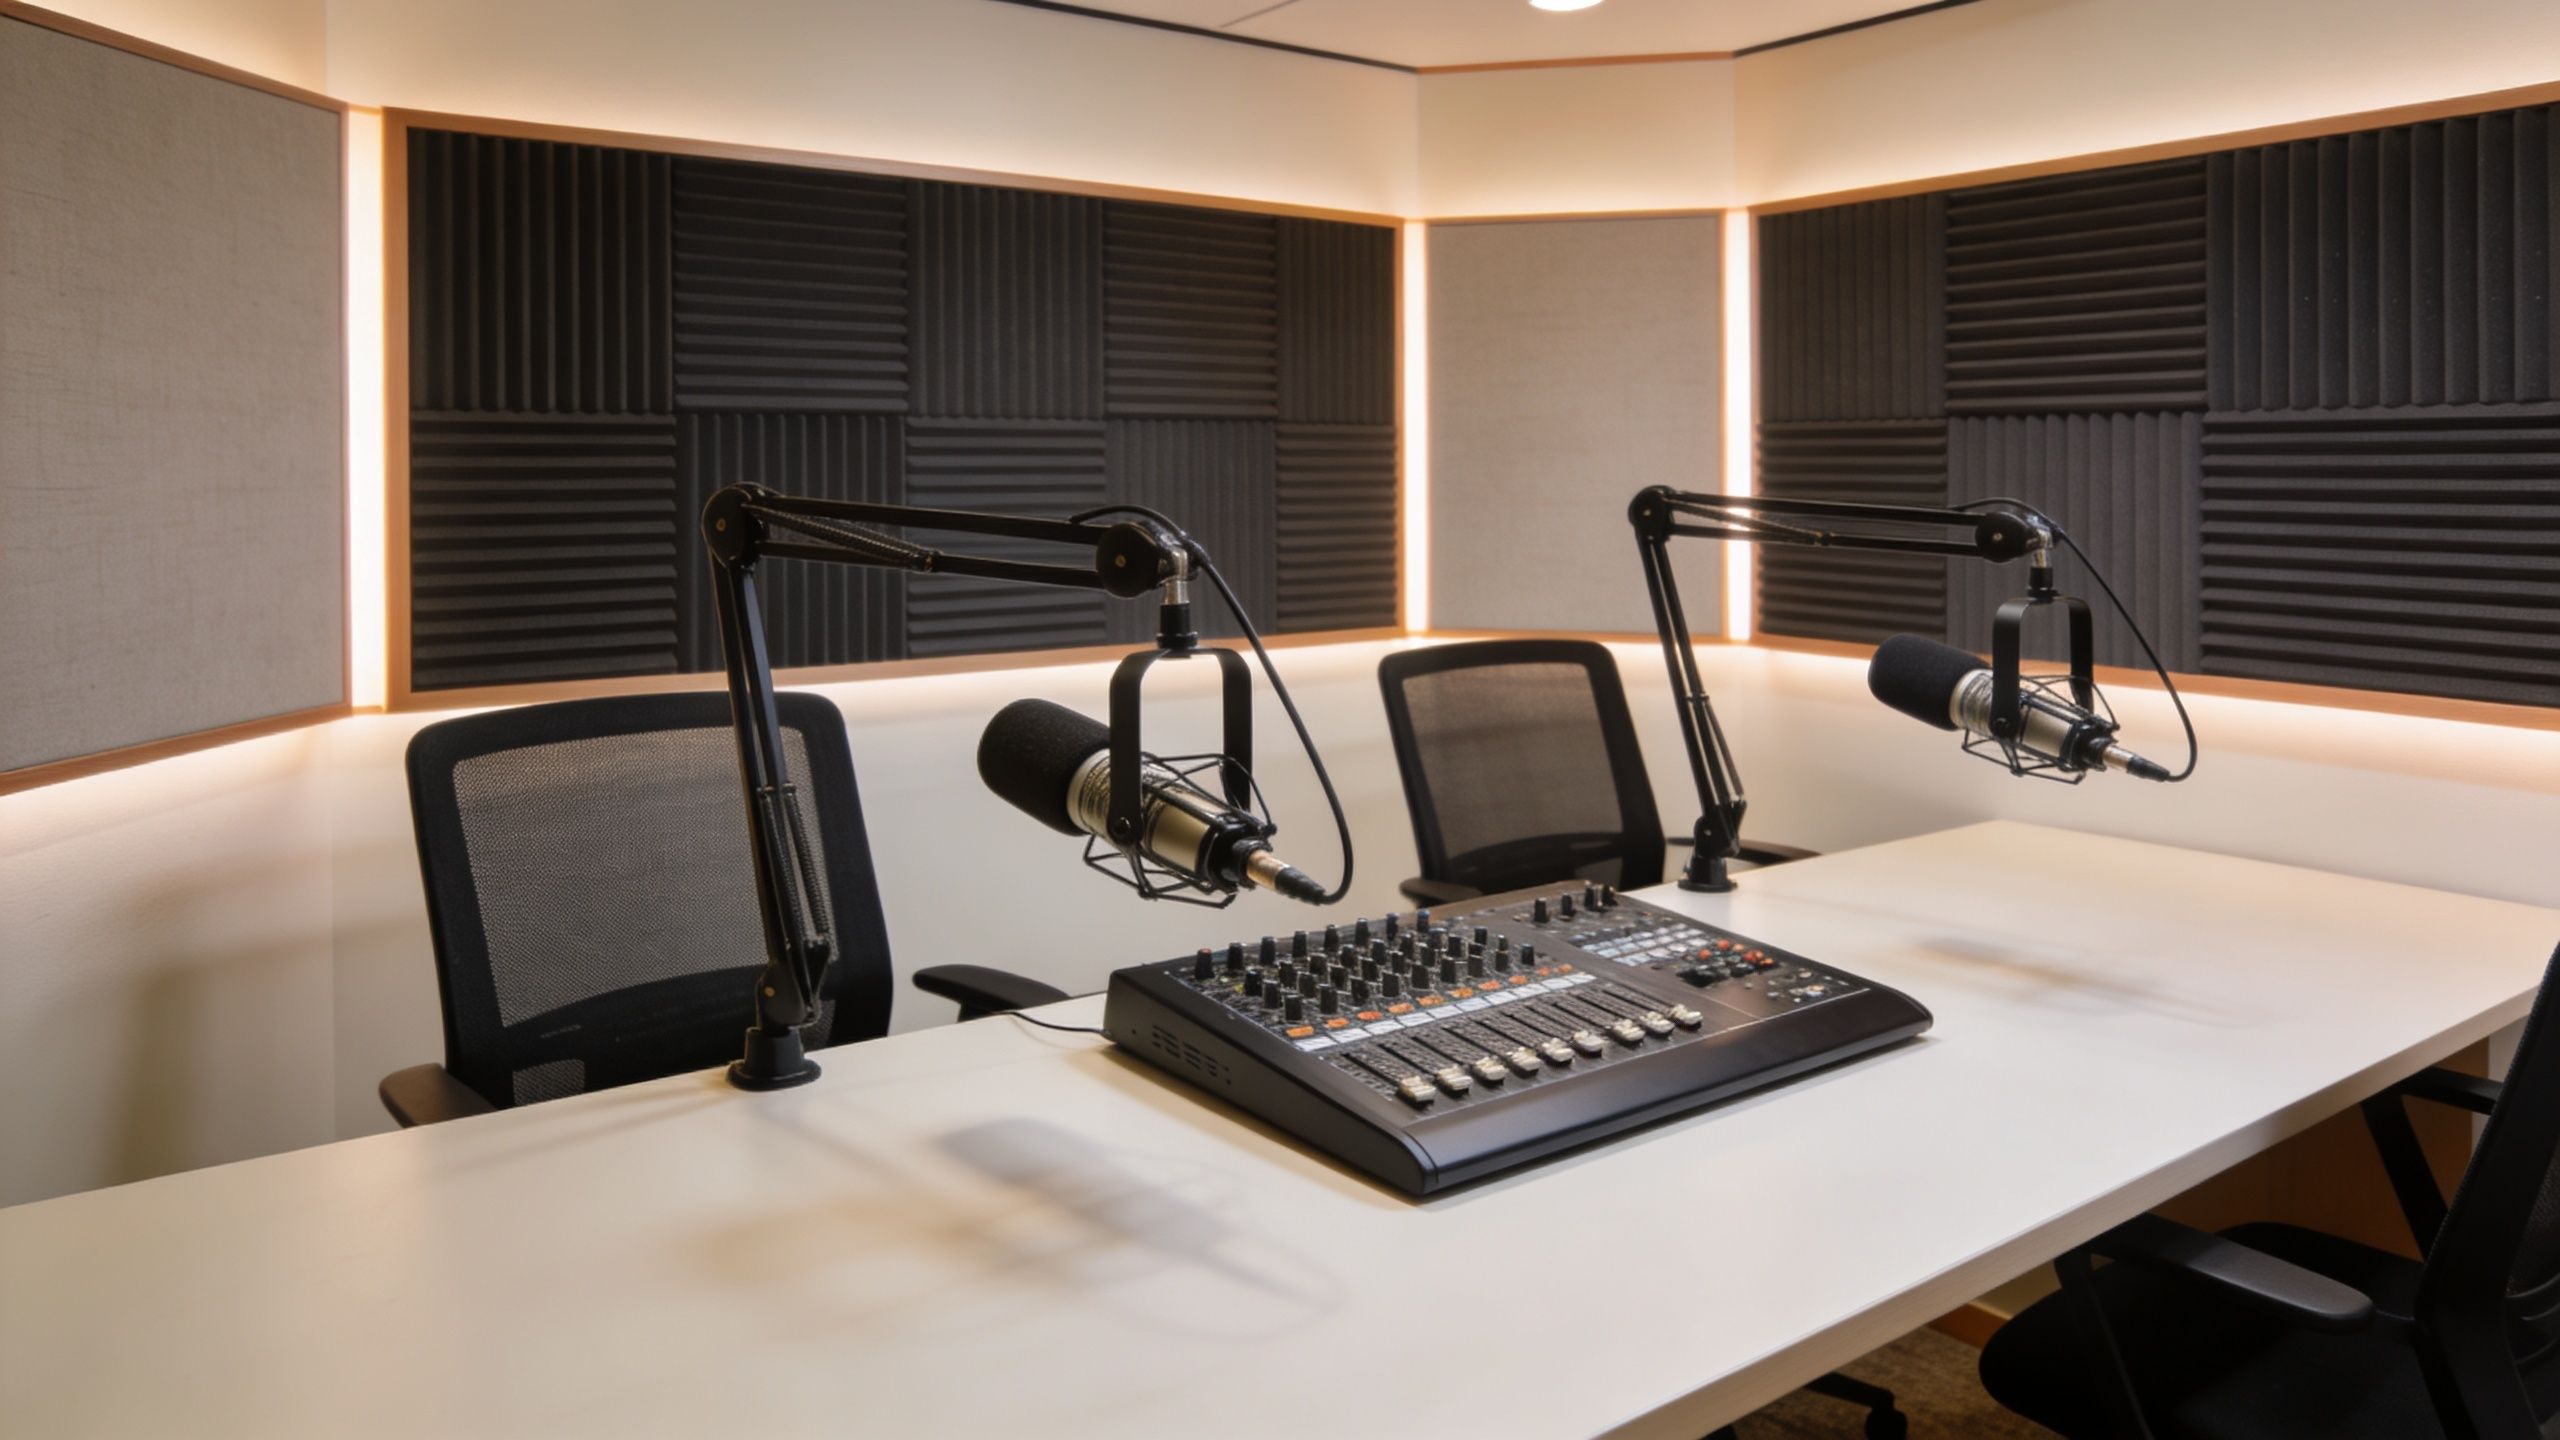
The Flexwork Solution Your Professional Podcast Launchpad
A professional podcast setup isn't always a pile of gear. Sometimes it's a production decision.
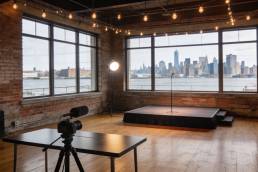
For creators in the NJ and NY area, this inside look at what makes a great podcast studio shows the practical advantages of recording in a treated space with gear that's already dialed in. That matters when your real goal is consistency, not hobbyist experimentation.
Start with the room, not the shopping list
Hourly studio rentals make sense for founders and creators who want to test a format without building a permanent home rig. You walk into an acoustically treated room, sit down in front of pro audio, and record in an environment designed to produce clean takes fast.
That changes the feel of a launch. Instead of wondering whether your office can pass for a studio, you're building the show in a space that already supports the standard you want.
Producer support removes the real bottleneck
The bigger problem for many beginners isn't recording. It's everything attached to recording.
That's where producer packages matter. A package like “Be My Podcast Producer” shifts the workload from self-managed chaos to a guided process. You're not juggling setup, capture, clean-up, and troubleshooting alone. You're working with a team that handles the technical side while you focus on performance, messaging, and guest chemistry.
For brands that want growth infrastructure around the show, the “Market, Manage & Produce My Podcast” tier starts at $1500 per episode with a 20-episode growth commitment, according to Flexwork's service brief. That structure fits companies treating a podcast as a serious media channel rather than casual content.
A Content Day is $3000 per day and includes 20 edited reels or 60 professional photos. A podcast website is $5000 plus hosting. Those options are useful when the podcast is part of a larger brand system, not a standalone file uploaded once a month.
Video is where DIY often stalls
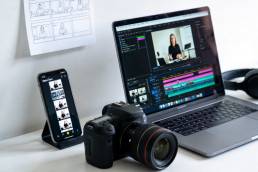
Many beginners can manage audio-only at home for a while. Video is where complexity jumps.
The verified data notes that DIY multi-camera video podcasting has a 55% abandonment rate, largely because syncing, switching, file handling, and editing become too much for one person to manage. It also notes that turnkey, pre-synced multi-camera feeds and professional editing solve that technical burden for creators who want reels and short-form cutdowns (multi-camera podcasting pain point reference).
A quick look at the production environment helps make that concrete:
If your vision includes long-form video, vertical clips, and a polished set, the launchpad isn't another purchase. It's a place and process that already support that output.
A Streamlined Workflow From Recording to Distribution
A beginner setup falls apart after the red light turns off.
Recording one solid episode is manageable. Building a repeatable system for planning, editing, packaging, and publishing is what separates a short-lived experiment from a show that grows. That is why gear alone rarely creates a professional podcast. The room affects your raw audio, and the workflow determines whether you can keep producing at a quality level your audience will trust.

Before you record
The best time to reduce editing time is before the session starts.
Creators who publish consistently usually prepare a bank of topics, define the audience clearly, and choose a release cadence they can maintain. Lisa Larter's guidance on podcast consistency and workflow makes the same point. Shows last longer when strategy and production habits are set early, not improvised every week.
Start with:
- An episode bank: Outline 12 to 20 topics before you record the first one.
- A clear listener profile: Decide who the show serves and what problem, question, or point of view it will return to.
- A realistic cadence: Weekly only works if your calendar, editing capacity, and promotion plan support it.
- A recording brief: A one-page outline keeps the conversation focused without making it sound scripted.
Studios like Flexwork help here because the workflow is already built. You show up with the message. The production process is ready for you.
During the session
Clean capture saves hours later.
According to AlphaCast's guide to gain staging and common podcast setup mistakes, uneven levels are one of the fastest ways to make a recording sound amateur, especially when one voice is much louder than another. Record separate tracks when possible, set gain for each speaker, and leave headroom so peaks stay under 0 dB.
A few habits make an immediate difference:
- Mic distance: Keep your mouth about 2 to 4 inches from the capsule.
- Off-axis positioning: Angle the mic slightly across the mouth to reduce plosives and sharp consonants.
- Closed-back monitoring: Wear headphones so you catch hum, clipping, or bleed while recording.
- One mic per speaker: Shared mics create level and clarity problems that are hard to fix later.
I see the same pattern often. New hosts try to repair bad capture in editing, then wonder why every episode takes too long. Good production starts with controlled input.
After recording
Post-production is where time disappears.
Editing includes cleanup, pacing, level matching, music placement, exports, titles, descriptions, clips, and scheduling. Video adds another layer with camera sync, reframing, captions, and social cutdowns. If you want an efficient tool for text-based edits and repurposed video, this review of the Descript AI video editor is a useful reference.
The question is not how much you can cut. It is how clearly the episode communicates.
Remove distractions. Keep the conversation moving. Preserve enough natural rhythm that the host still sounds human. For a practical editing checklist, Flexwork's guide to podcast post-production best practices covers the finishing steps in detail.
A workflow that holds up under pressure
The beginner workflow I recommend is simple and repeatable:
Plan in batches
Group topic research, outlines, and guest prep into one planning session.Record in batches
Capture multiple episodes while your energy, set, and sound are already dialed in.Edit from a fixed checklist
Follow the same order each time: cleanup, content cuts, leveling, export, metadata, publishing assets.Package each episode for distribution
Prepare the episode title, show notes, thumbnails, clips, and platform uploads before release day.Review the process monthly
If the same delay shows up every episode, change the system.
That is where professional support earns its keep. Flexwork removes the friction on both sides of the equation. The acoustic environment is already controlled, and the production path from session to published episode is already set up. For an ambitious founder or creator, that means less time troubleshooting and more time building a show that sounds ready for serious growth.
Launch Your Podcast With Confidence in 2026
A polished show doesn't start with a luxury budget. It starts with smarter decisions.
The strongest podcast setup for beginners is built around two things most gear guides underrate: a controlled acoustic environment and a workflow you can consistently repeat. Once those are in place, equipment becomes easier to choose, sessions feel lighter, and your show starts sounding aligned with the brand you're trying to build.
A simple launch checklist helps:
- Choose your recording environment first: Fix the room before upgrading the mic.
- Pick gear that matches your stage: Simple beats impressive when you're learning.
- Set recording technique standards: Stable mic distance and monitoring matter.
- Plan multiple episodes ahead: Don't build your show one week at a time.
- Create a publishing system: Recording is only one part of the job.
- Get help where friction is highest: Studio support, editing, or production can remove the bottleneck.
If you're getting ready to publish, this guide on how to launch a podcast is a smart next step.
If you want a faster path from idea to polished episode, explore Flexwork Podcast Studios. Book a tour, review the production options, and choose a setup that supports your ambition from day one.