How to Edit Podcast Audio: A Start-to-Finish Guide
Meta description: Learn how to edit podcast audio from cleanup to final export, plus when to DIY and when to hand post-production to a studio team.
URL slug: /how-to-edit-podcast-audio
Primary keyword: how to edit podcast audio
Secondary keywords: podcast audio editing, edit podcast audio, podcast post-production
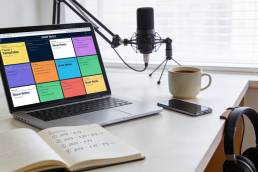
You finished the interview, the conversation was sharp, and everyone sounded great in the moment. Then you open the session later and reality hits. There are mouth clicks, long pauses, cross-talk, level jumps, and that low room hum you somehow missed while recording.
That’s the moment a lot of promising shows stall.
Learning how to edit podcast audio is part technical skill, part taste, and part business decision. Good editing turns a strong conversation into something people want to finish. It shapes pacing, protects your brand, and makes your show feel intentional instead of improvised. For creators recording in New Jersey and the wider NYC orbit, that polish matters fast because your audience is comparing your show to every other polished voice in their feed.
From Great Conversation to Great Podcast
A raw podcast rarely sounds as good as the conversation felt.
That disconnect catches new creators off guard. You remember the guest’s best answer, the joke that landed, the moment the energy shifted. But your editing screen shows a different version of the same session. It shows false starts, stacked voices, chair noise, filler words, and sections that dragged longer than they should have.
The good news is that podcast editing is learnable.
The even better news is that you don’t need to become an obsessive engineer to make better decisions. You need a repeatable workflow. You need to know what to fix first, what to leave alone, and which tweaks improve clarity versus which ones just waste an evening.
Clean editing isn’t about making people sound robotic. It’s about removing the friction that keeps listeners from staying with the story.
When creators get this part right, the show feels smoother, more confident, and more valuable. When they don’t, even great ideas can sound disposable.
The DIY Dilemma Quality Versus Time
Editing your own show can be smart. It can also become a slow leak on your calendar.

For a new host, DIY editing builds instincts fast. You hear your own pacing problems. You notice where you interrupt guests. You learn what your mic sounds like. That feedback loop has value.
But the trade-off shows up quickly. The same person who books guests, outlines episodes, records content, writes promotion, and runs a business is now also expected to clean breaths, level dialogue, remove noise, export finals, and troubleshoot software. That’s where momentum gets expensive.
Poor audio hurts more than people admit
Listeners forgive a lot. They don’t forgive friction for long.
If your volume jumps between speakers, if one voice sounds muddy while the other sounds thin, or if music competes with speech, the show feels less trustworthy. Not because the ideas are weak, but because the presentation tells people you’re still figuring it out.
That matters for founders, consultants, agencies, and personal brands. Your podcast isn’t just content. It’s a representation of how you work.
A rough edit can signal any of these problems:
- Lack of control: The host sounds unprepared, even when they weren’t.
- Brand inconsistency: One episode feels polished, the next feels rushed.
- Audience fatigue: People stay interested in the topic but stop enjoying the experience.
The primary cost isn’t software
Most creators frame the decision around tools. Which DAW should I use? Which plugin should I buy? Which shortcut saves time?
Those are useful questions. They’re not the main question.
The key question is what happens to the rest of your business when post-production starts swallowing your week. Time spent fixing room tone is time not spent pitching better guests, refining your offer, or repurposing clips into growth assets.
That’s why a lot of creators eventually separate recording from editing. They still own the voice and direction of the show. They just stop doing every technical step themselves.
If you’re still building your setup at home, Flexwork’s guide on enhancing your brand with a home podcasting studio helps clarify what belongs in your recording environment and what can be handled later in post.
DIY works best when you know its limits
There’s nothing wrong with editing your own podcast. The mistake is pretending it costs nothing.
Use DIY when you want to sharpen your ear, protect budget, or stay close to the material early on. Move away from DIY when the edit starts delaying releases, lowering consistency, or draining the energy you need for the part only you can do.
Practical rule: If editing makes you publish less often or avoid recording altogether, it’s no longer a productivity hack. It’s a bottleneck.
The Essential Audio Editing Workflow
Professional editing is less about secret tricks and more about order. Do the right jobs in the right sequence, and each stage gets easier.
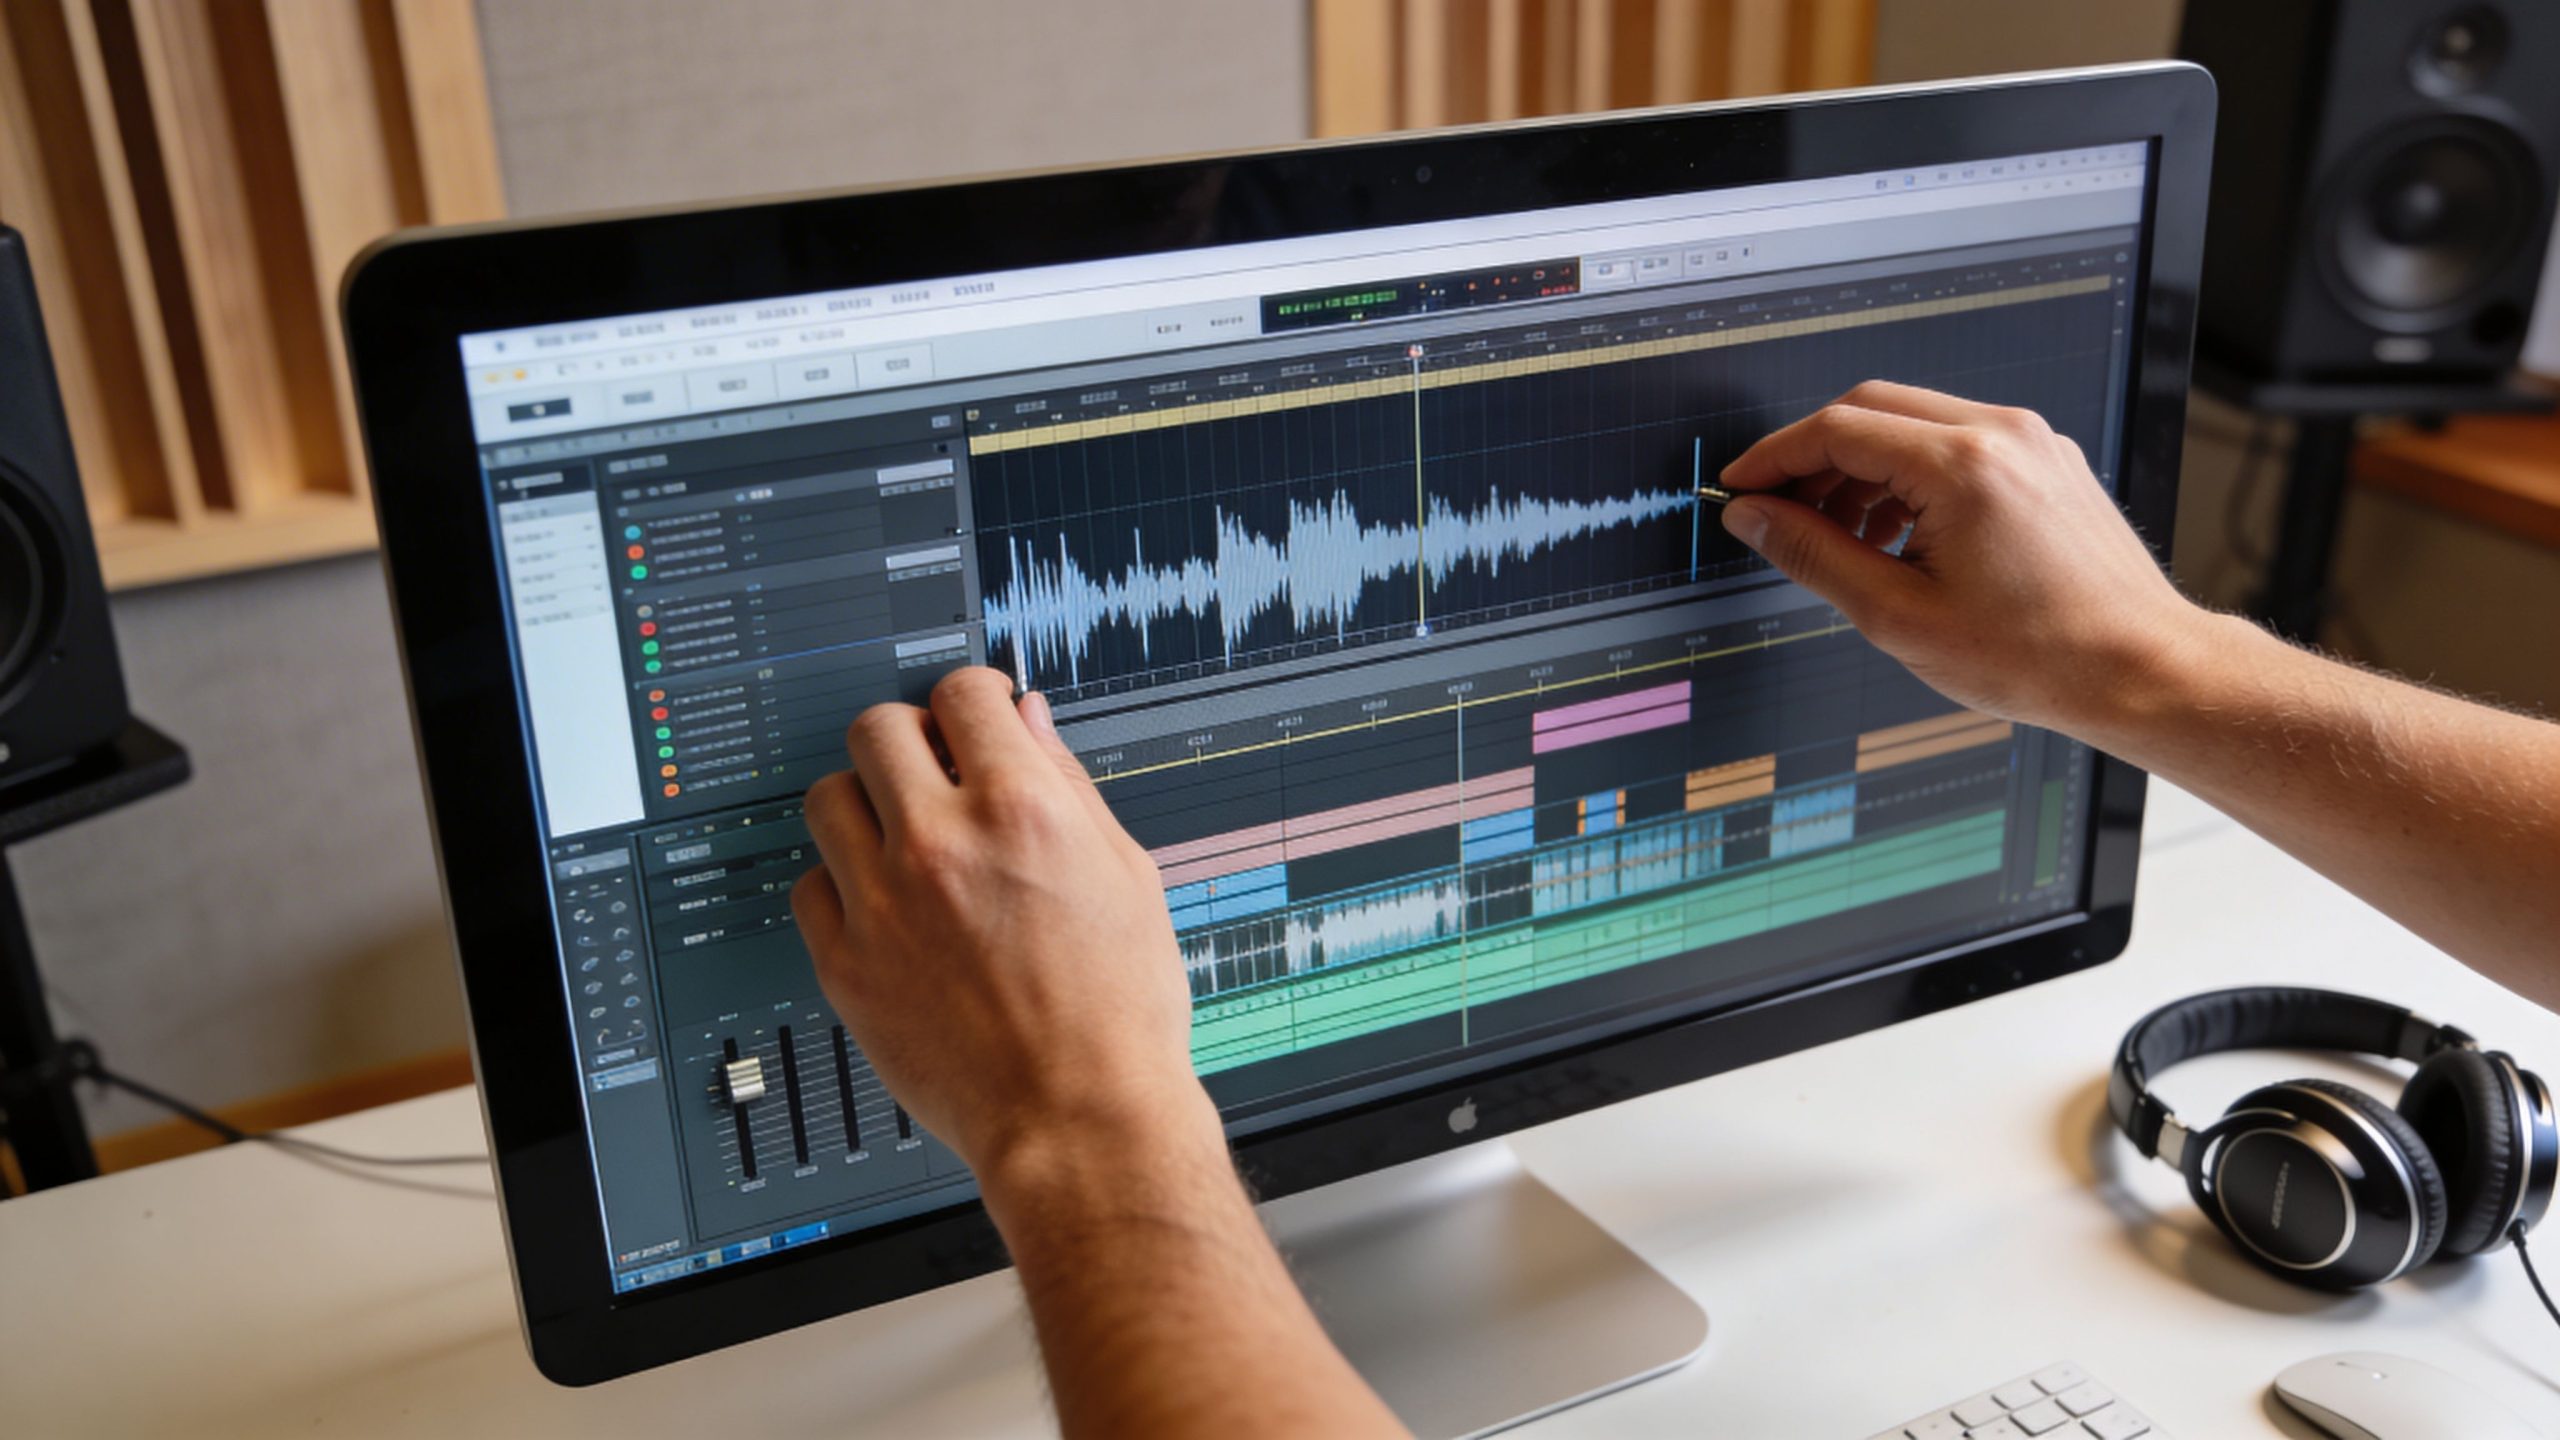
If you’re learning how to edit podcast audio, start with a workflow that protects your original files and keeps decisions simple. Don’t jump into plugins the second you import audio. First, get organized. Then shape the content. Then polish the sound.
Start with session prep
The cleanest editors are usually the cleanest organizers.
Before touching the waveform, create a project structure that makes sense a week later, not just in the moment. Keep raw files untouched. Duplicate anything you plan to edit destructively. Label tracks by speaker name, not “Track 1” and “Track 2.” Color-code if your software allows it.
A simple prep checklist:
- Create a raw folder: Keep your original recordings unchanged.
- Rename tracks clearly: Host, guest, music, ads, room tone.
- Set a master session: Use one project file for the full episode, not scattered versions.
- Save in stages: Rough cut, cleanup, mix, final export.
This sounds basic because it is. It also prevents the classic mistake of making ten smart edits inside a chaotic project.
Do the content edit before the sound edit
Most beginners do this backward. They start removing hiss or tweaking EQ before they even know what parts of the conversation are staying.
Edit the story first.
That means listening for the pieces that improve pacing and clarity:
- repeated thoughts
- long detours
- false starts
- interruptions that add nothing
- filler words that distract
- dead air that makes the show feel slow
The source material from Fame notes that speech editing often includes removing filler words like “um,” “uh,” and “you know,” tightening excessive pauses, and using crossfades to smooth abrupt transitions while maintaining smooth flow. It also notes that proper mic placement matters, with the mic positioned 6 inches away and angled at 45 degrees to avoid plosives, and that gentle cuts in the 200-500 Hz range can reduce muddiness while slight boosts around 2-5 kHz can improve clarity. The same source adds that the global podcast audience has exceeded 580 million listeners (Fame).
The key is restraint. Don’t remove every breath. Don’t strip every verbal tic. Keep the humanity, cut the drag.
Leave in what sounds natural. Remove what pulls attention away from meaning.
Use crossfades to hide the surgery
Cuts that look clean on screen can sound abrupt in headphones.
When you remove a phrase or tighten a pause, use short crossfades so the transition feels continuous. This matters even more in solo episodes, where one choppy cut can make a host sound jumpy and tense.
A few places where crossfades help:
| Edit type | Why it matters |
|---|---|
| Removing filler words | Prevents the voice from snapping unnaturally |
| Tightening long pauses | Preserves rhythm instead of creating dead stop edits |
| Joining alternate takes | Helps match room tone and vocal texture |
| Cleaning interview interruptions | Makes overlaps feel deliberate rather than hacked apart |
Reduce noise carefully
Noise reduction is where many amateur edits start sounding processed.
If your file has constant hiss, HVAC rumble, or background hum, use noise reduction lightly. The goal is to lower distraction, not sterilize the room. Push it too hard and you’ll get that watery, metallic sound that screams “bad plugin setting.”
Try this approach:
- Find a short section of pure room noise.
- Capture that as your noise profile if your software supports it.
- Apply reduction conservatively.
- Listen to consonants and sibilants after processing.
- If the voice starts sounding brittle or phasey, back off.
Noise reduction helps. It doesn’t replace a good recording space.
For hosts who also produce intros, ads, or branded narration, a basic voice performance refresher can improve the source before editing even begins. This guide on how to do a voiceover is useful because delivery choices often solve problems that plugins can’t.
Shape the tone with EQ
Equalization, or EQ, is where you improve intelligibility without changing the personality of the voice.
A few frequency areas matter more than the rest for spoken word. The verified guidance from Wavve recommends gentle cuts in the 200-500 Hz range to reduce muddiness and slight boosts around 2-5 kHz to improve clarity. It also stresses that heavy-handed EQ can make voices sound harsh or unnatural, which is exactly what happens when people start boosting because “brighter” feels better at first listen.
Use EQ like seasoning, not repainting.
A practical sequence:
- High-pass lightly if needed: Remove low-end rumble that doesn’t belong in speech.
- Cut mud first: If the voice feels boxy or boomy, inspect the 200-500 Hz area.
- Add presence carefully: If the voice needs more definition, try a slight lift around 2-5 kHz.
- Recheck after a short break: Ears adapt fast. What felt exciting ten minutes ago may now sound sharp.
Control dynamics with compression
People don’t listen in perfect environments. They listen in cars, on walks, through laptops, and on small speakers. Compression helps your dialogue stay intelligible across all of them.
According to Wavve, professional podcast editors commonly use compression ratios of 3:1 or 4:1 to even out dynamic range, with a fast attack to catch loud moments quickly and a moderate release that works well for spoken-word content. The same guidance warns that overcompression flattens audio and creates listener fatigue (Wavve).
That last part matters most.
Compression should make the performance feel more controlled, not more trapped. If your voice starts sounding squeezed, lifeless, or oddly dense, you’ve gone too far.
Here’s a useful listening test:
- Good compression sounds like: Better consistency, fewer sudden jumps, more comfortable listening.
- Bad compression sounds like: Pumping, no natural rise and fall, a host who suddenly feels too close.
Watch the loudness target at the end
Loudness is not the same thing as peak level.
An episode can avoid clipping and still play too softly or too inconsistently across platforms. Wavve notes that the common loudness targets are -16 LUFS for stereo files and -19 LUFS for mono files, which align with recommendations from Apple and Spotify for consistent playback.
This is one of those technical details that affects brand perception more than most creators realize. If your audience has to turn one episode up and the next one down, the show feels less polished even if the content is excellent.
Review the mix in real-world conditions
A final listen inside your editing setup isn’t enough.
Use more than one playback environment before you publish:
- Headphones: Catch clicks, edits, hum, and breath issues.
- Laptop speakers: Check speech clarity without flattering low end.
- Phone speaker: Make sure the main voice still cuts through.
- Car test if possible: Useful for hearing level consistency in a noisy setting.
If your workflow still feels patchy, Flexwork has a practical article on post-production best practices for perfecting podcast episodes that helps translate these editing ideas into a production routine.
A quick walkthrough can help if you want to see the process in action.
Advanced Mixing and Modern Recording Challenges
Once your dialogue is cleaned up, the job shifts from repair to presentation. At this point, a podcast begins to sound produced rather than merely edited.

Mix music so it supports the voice
Intro music can add identity fast. It can also bury your opening line.
The cleanest approach is to treat music as a framing device, not a co-star. Bring it in, establish the mood, then lower it under the voice with a smooth fade or ducking setup. If your software supports sidechain compression, use it. That lets the voice automatically push the music down while the host is speaking.
A simple music checklist:
- Short intros work better: Don’t force listeners through an overlong open.
- Fade with intention: Abrupt starts feel cheap unless that’s part of the brand.
- Keep speech first: If the words suffer, the music is too loud.
- Match the outro energy: A calm interview doesn’t need a dramatic sendoff unless the brand calls for it.
Mix note: Listeners should notice the confidence of your opening, not the effort of your automation.
Remote episodes need a different workflow
Remote podcasting is where editing gets messy fast.
One guest uses a USB mic in a treated room. Another joins from a kitchen. A third records through a laptop mic while notifications leak into the track. The problem isn’t just syncing. The problem is making the whole conversation feel like one show.
LucidLink’s podcast editing guidance points to the primary challenge for distributed teams and remote recordings: normalizing inconsistent audio. It notes that professional workflows go beyond a simple clap sync and involve timecode syncing features and intelligent audio matching to balance tracks recorded on different devices and in different acoustic environments, which is especially important for multi-participant shows (LucidLink).
That changes how you edit.
A practical remote workflow
For multi-speaker remote sessions, work in this order:
- Sync the files first using timecode if available, or a clap/slate if that’s what you have.
- Choose a reference voice that sounds the most natural and stable.
- Match the other voices toward that reference, not toward some generic preset.
- Normalize obvious level differences before deeper processing.
- Use EQ and cleanup individually, because each room creates different problems.
- Listen for continuity between speakers, not just solo quality.
That last point matters. A track can sound good by itself and still feel wrong in context.
Tools that save time without flattening quality
The best tools reduce repetitive work. They don’t replace judgment.
A few categories are worth exploring:
- Dialogue cleanup tools: Useful for noise, clicks, and basic repair.
- Leveling tools: Good for smoothing speech before final loudness control.
- Template sessions: Save routing, music beds, and track labels for recurring shows.
- Keyboard shortcuts and macros: Small gains add up over a full season.
If you need to isolate a vocal from a music-heavy clip or recover usable dialogue from a less-than-ideal asset, an audio stem separator can be helpful in edge cases. It won’t rescue every file, but it can give you cleaner elements to work with when source material is messy.
For creators comparing software before building a repeatable setup, this roundup of free podcast editing software is a useful place to sort lightweight tools from platforms that can handle larger, recurring productions.
The Flexwork Solution From Burnout to Broadcast
At some point, the question stops being “Can I edit this myself?” and becomes “Should I still be the person doing it?”
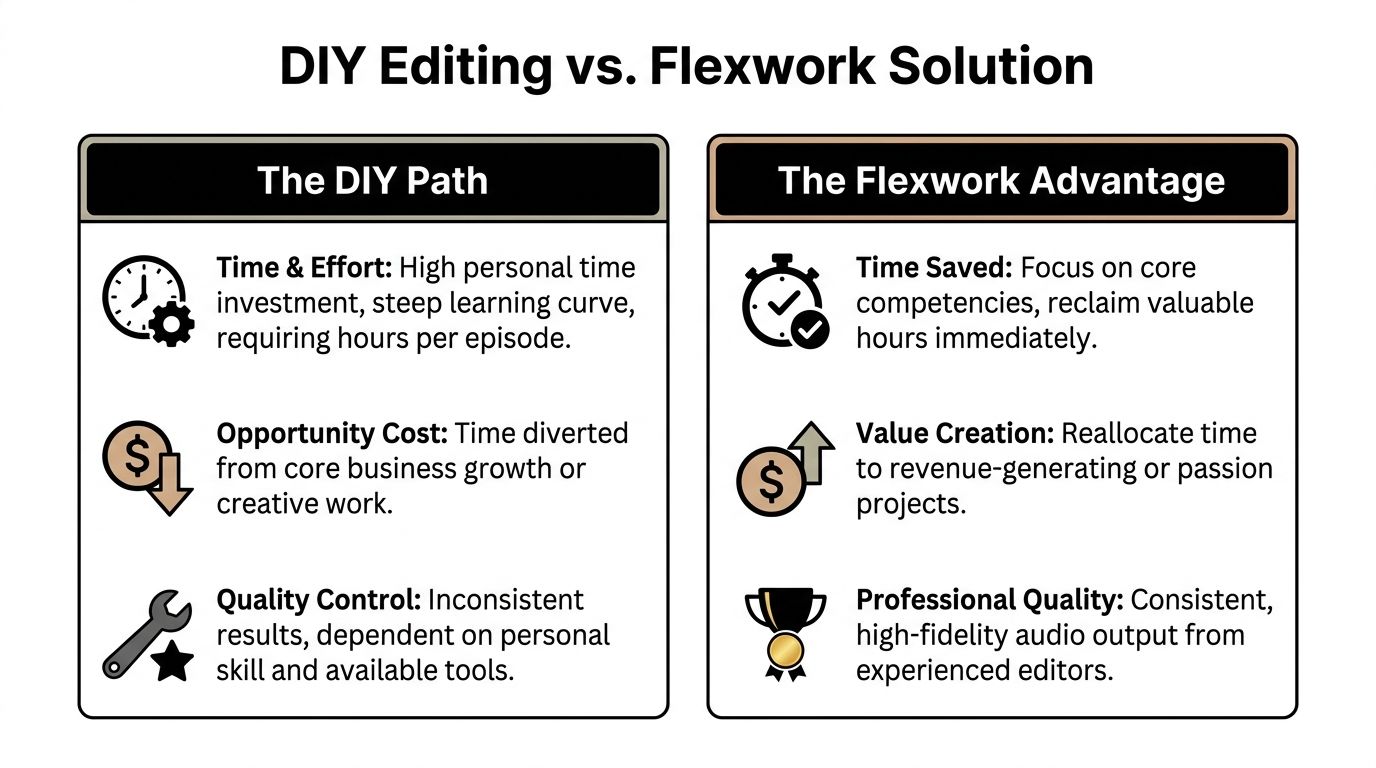
For early-stage creators, DIY can be a sharp way to learn. For busy founders, agencies, and hosts publishing consistently, DIY often becomes an invisible tax. The show may still go out, but everything around it gets slower.
What delegation buys you
Handing off editing isn’t about avoiding craft. It’s about protecting the parts of the business that only you can drive.
When a post-production team handles cleanup, leveling, pacing, and final delivery, you get back capacity for work like:
- Guest development: Better outreach and stronger interviews
- Content expansion: Clips, newsletters, and topic planning
- Offer building: Turning audience attention into services, products, or partnerships
- Creative stamina: Showing up for the mic without dreading the edit after
That’s the fundamental upgrade. Not merely “done for you,” but “no longer clogging the rest of your pipeline.”
Where a studio partner fits
Some creators need a room to record in. Others need editing support after they leave the mic. Others need the whole chain handled in one place.
Flexwork Podcast Studios offers audio editing service support as part of a broader production workflow, which can make sense for hosts who want recording, post, and content support aligned instead of split across freelancers and apps.
The fit is different depending on how you work.
| Creator type | DIY likely works when | Production support makes more sense when |
|---|---|---|
| Solo host | You enjoy editing and publish at a manageable pace | You’re delaying releases or losing energy after recording |
| Founder or coach | The podcast is occasional and low stakes | The show supports your brand and needs consistency |
| Agency or team | One person owns post-production internally | Multiple episodes, guests, or stakeholders create bottlenecks |
| Growing network | You’re still testing format | You need repeatable delivery and quality control |
Package thinking beats one-off fixes
A lot of creators try to solve editing stress with one new plugin, one new microphone, or one freelancer hired in a panic before launch day.
That usually patches symptoms, not process.
A better move is to think in systems. If you want reliable output, you need a repeatable recording method, a predictable post-production path, and clear ownership over the final deliverable. That’s why full-service support can outperform piecemeal fixes for serious shows.
The author brief for this article notes three pricing points that matter if you’re comparing service models:
- Content Days are $3000/day and include 20 edited reels or 60 pro photos
- Podcast websites are $5000 plus hosting
- The Market, Manage & Produce My Podcast package starts at $1500 per episode with a 20-episode growth commitment
Those numbers matter less as line items than as a signal of what the work includes. Once a show becomes part of brand strategy, editing is no longer an isolated task. It sits beside creative direction, distribution, visual assets, and audience development.
The fastest way to make a podcast feel expensive isn’t fancy equipment. It’s consistency.
The strategic decision
If you love editing, keep doing it. If you hate editing but still have the margin to learn, do it long enough to build taste.
But if post-production is the reason episodes ship late, ideas die in folders, or the show never reaches its visual and audio standard, delegation becomes the rational move. Not because editing is beneath you. Because growth usually depends on focus.
Exporting and Publishing Your Polished Episode
A strong edit can still be undermined by a sloppy export.
Your final file should be easy for hosting platforms to process and easy for listeners to stream. Keep your delivery clean and conventional unless you have a specific reason to do otherwise.
Final export checklist
- Choose the right format: MP3 is typically the practical publishing format. WAV is useful as an archive master.
- Keep a final master copy: Save one untouched final version before making alternate edits.
- Check stereo versus mono intentionally: Export based on how the episode was mixed.
- Name files clearly: Show name, episode number or title, and version status.
- Add metadata: Episode title, show title, artist name, and cover art should be embedded so players display your episode correctly.
- Do one full quality-control listen: Don’t skim. Listen from open to close.
- Test on more than one device: Headphones and a phone speaker catch different problems.
If your host platform lets you add episode descriptions and scheduling inside the dashboard, review everything once more before publishing. The handoff from production to distribution should feel boring. That’s a good sign. Boring means reliable.
The worst publishing mistake isn’t a technical one. It’s rushing the last five minutes because you’re tired of the episode. Finish carefully. Listeners only hear the final version.
Your Path to Broadcast Quality Sound
A strong podcast doesn’t win on ideas alone. It wins on delivery.
That’s why learning how to edit podcast audio matters so much. Editing shapes trust. It controls pacing. It makes your insights easier to hear and your brand easier to remember. Done well, it disappears. The listener just feels that the show is worth their time.
You can build this skill yourself. That path teaches taste, discipline, and respect for the craft. You can also decide that your best contribution is the conversation, the strategy, and the audience relationship, then hand the technical finish to a team built for it.
If your current episodes still sound rough, or your editing routine is eating the time you need for growth, start by tightening your standards. This guide on how to improve audio quality is a strong next step.
Broadcast-quality sound isn’t a vanity upgrade. It’s part of the product.
If you’re ready to spend less time fixing waveforms and more time building a show people remember, explore Flexwork Podcast Studios.