Your Multi Camera Podcast Setup: A Pro-Level Guide
 June 7, 202626 Minutes
Meta title: Your Multi Camera Podcast Setup Guide
Meta description: Learn how to choose the right multi camera podcast setup, workflow, and studio path for polished episodes, reels, and faster production.
URL slug: /multi-camera-podcast-setup-guide
A lot of podcasters hit the same wall. The audio is clean. The conversation is strong. The guest is excellent. Then the video goes live, and it looks flat because one locked-off angle has to carry the entire show.
That's usually the moment a creator starts searching for a multi camera podcast setup. Not because they suddenly care about gear for gear's sake, but because they want the show to feel bigger, sharper, and more watchable. They want content that works on YouTube, clips that look intentional on social, and a production process that doesn't turn every episode into a small crisis.
The question isn't just what cameras to buy. It's which path makes sense for your stage, your team, and your time. For some creators, that means building a system at home. For others, it means using a studio workflow that already solves the hard parts. Either way, the goal is the same. Better storytelling, less friction, and content that looks like it belongs in a serious media brand.
From Static Shots to Dynamic Storytelling
A host asks a pointed question. The guest smiles, pauses, then gives the answer that will become the clip everyone shares. In a one-camera setup, that moment often lands flat because the frame never changes. You hear the shift in energy, but you do not fully see it.
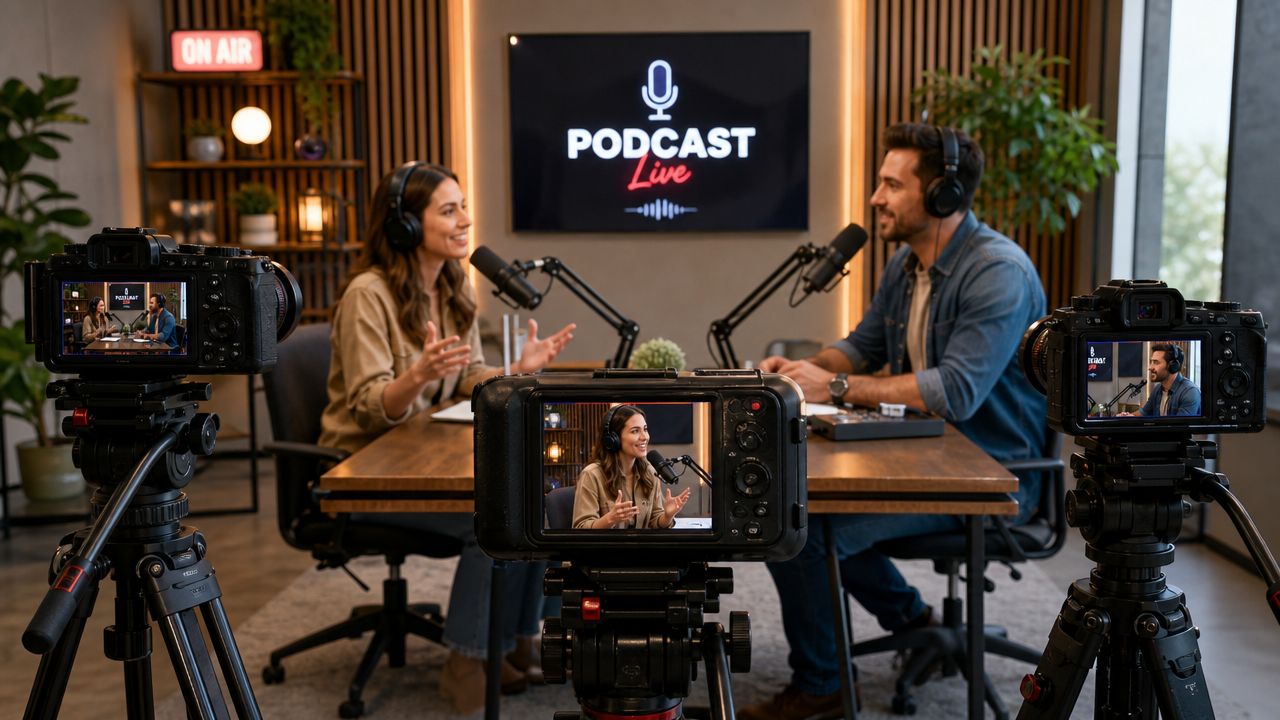
Multi-camera production fixes that by giving the conversation visual structure. For a two-person podcast, the common baseline is simple: one wide shot for the full set and one tighter shot on each speaker. That coverage gives the editor control over pace, emphasis, and timing instead of forcing every moment through the same static frame.
Why viewers feel the difference
Cuts work best when they follow intention.
A close-up holds on the host when a question needs weight. A reaction shot catches the guest thinking before they speak. The wide shot resets the room when both people start talking over each other or when body language adds context. Those choices make a long conversation easier to watch because the frame keeps guiding attention to the right place.
Editors feel the difference just as quickly. With multiple angles, they can hide pauses, tighten phrasing, and shape clips for different platforms without making the episode look stitched together. That is a big reason creators studying Planning, filming, editing YouTube videos eventually stop treating camera coverage as a gear question and start treating it as a production decision.
The setup also signals your brand
Viewers judge visual intent fast. They may not know focal lengths or switching terminology, but they can tell when a show looks designed instead of merely captured.
That affects more than aesthetics. Guests are more confident walking into a set that looks organized. Sponsors notice consistency. New viewers are more likely to stay with a show that feels paced and considered. Creators who care about how compelling storytelling keeps an audience engaged study camera choices for the same reason they study hooks and pacing. The frame changes how the story is received.
Where DIY setups usually break down
The camera count is rarely the problem. The workflow is.
A DIY team can absolutely build a strong multi-camera podcast. Many do. But the quality gap usually shows up in the repeatable parts of production:
- One angle does too much: Every beat of the conversation carries the same visual weight.
- Edits become harder to hide: Without a second or third angle, trimming for pace can create obvious jump cuts.
- Short-form clips feel compromised: A frame that works for a full episode often crops poorly for vertical distribution.
- Weekly production gets heavy: Lighting, sync, media management, switching, and post can eat more time than the recording itself.
That is the fork in the road. One path is building your own system and accepting the setup, testing, and troubleshooting that come with it. The other is using a studio workflow that already has the coverage, lighting, and production process dialed in. Both paths can produce a strong show. The better choice depends on whether you want to spend your time engineering the production or using it to make sharper content.
Designing Your Multi-Camera Production Workflow
The strongest DIY setups aren't built around shopping lists. They're built around workflow. If the cameras don't match the room, if the lighting fights the skin tones, or if the audio sync falls apart in post, expensive gear won't rescue the episode.
A clean setup starts with three decisions. Framing, lighting, and sync.
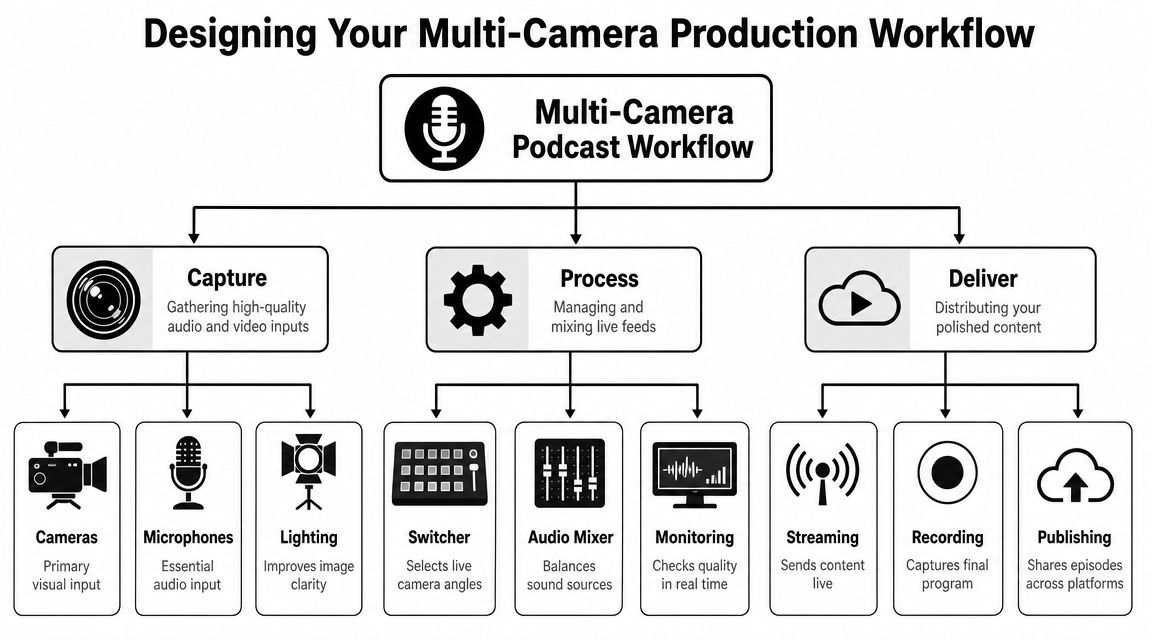
Build the frame first
A practical workflow uses one wide establishing shot plus one tight shot per speaker, with cameras kept at similar heights and angles so the cuts feel consistent. B&H notes that compact productions commonly pair a wider lens in the 16–35 mm range for the group shot with longer lenses around 50–100 mm, with some setups going up to 150 mm, for individual close-ups in their multi-camera video podcast setup guide.
That recommendation is useful because it reflects how viewers expect podcast video to look now. The wide shot establishes the space. The close-ups create intimacy.
If you're building a two-person set, this is the simplest framing logic:
- Wide camera: Show both speakers and enough of the set to establish place.
- Host close-up: Keep it tight enough to capture expression without feeling cramped.
- Guest close-up: Match the host camera as closely as possible so the edit feels balanced.
Keep your visual continuity clean
Mismatched angles are one of the fastest ways to make a setup look amateur. If one camera sits high and another sits low, the cuts feel jumpy. If one lens is noticeably distorted and another looks compressed, the sequence feels disjointed.
Use this checklist before you record:
- Match eye lines: Keep both close-up cameras at a similar height.
- Control exposure: Fixed-aperture zooms help avoid brightness shifts during reframing.
- Preserve composition: Leave enough room above the subject for graphics and potential reframes.
- Protect the wide: It's your safety angle when someone interrupts, laughs, or leans out of position.
Here's a useful companion resource if your show also feeds a broader video strategy. TimeSkip's piece on Planning, filming, editing YouTube videos is worth reviewing because podcast production becomes easier when the episode isn't treated as an isolated asset.
A working setup also needs a place to produce more than the episode itself. That's why many creators batch interviews, promos, and social content together through a Content Day workflow for podcasters, rather than resetting the room every time they need one more reel.
Light for depth, not just brightness
A lot of DIY creators over-focus on the camera body and under-focus on lighting. Viewers notice lighting first.
A simple three-point approach still works well for podcast sets:
| Element | Job | What to watch |
|---|---|---|
| Key light | Main shaping light on the face | Keep it flattering and consistent |
| Fill light | Softens shadows | Don't flatten the face completely |
| Back light | Separates subject from background | Use gently so it doesn't look theatrical |
The goal isn't drama. It's dimension. You want each speaker separated from the set, with enough consistency that angle changes don't suddenly alter skin tone or mood.
Practical rule: If your close-up looks polished but the wide shot looks dead, the issue is usually set lighting, not camera quality.
Sync audio before post becomes painful
Good multi-camera editing starts before the first question. If your audio and video don't line up cleanly, every edit takes longer.
You can handle sync in a few ways:
- Record a master audio feed that all cameras can reference later.
- Use timecode-capable tools if your setup supports them.
- Slate the session with a clap at the beginning if you need a simple manual marker.
Later in the edit, that single habit saves time. It also gives you confidence that your multicam sequence won't drift when the conversation runs long.
A lot of creators can build this workflow themselves. The catch is consistency. Doing it once is easy. Doing it every week without errors is what separates a hobby setup from a production system.
Later in this section, seeing the workflow in motion helps more than another equipment paragraph.
Choosing Your Path Live Switching vs ISO Recording
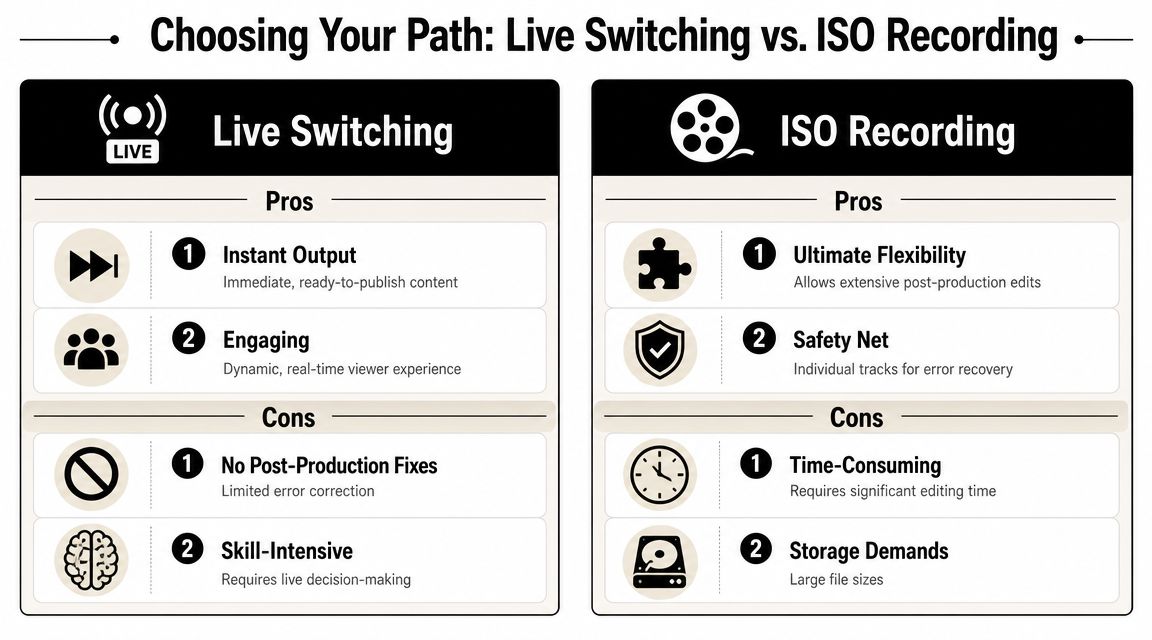
Once your cameras are placed and rolling, the next decision changes everything. Do you want to switch live while recording, or do you want to capture isolated feeds from every angle and decide later in the edit?
Both paths work. They just solve different problems.
Live switching for speed
Live switching means someone chooses the active camera in real time. The result is a nearly finished program feed by the end of the session.
That's appealing when turnaround matters. If the episode needs to go out fast, live-switched production can reduce post-production time, as explained in this comparison of multi-camera recording workflows.
Live switching works best when:
- The format is predictable: Interviews, recurring segments, and well-structured shows are easier to direct live.
- The team is small: You may not have an editor available to recut every moment later.
- Speed matters more than revision: You want something clean and fast, not endlessly adjustable.
The trade-off is obvious. If the wrong camera gets chosen at the wrong moment, that choice may be locked in.
ISO recording for flexibility
ISO recording saves each camera angle separately. That gives the editor the full conversation from every camera, not just the switched output.
That extra flexibility matters more than people think. You can fix awkward timing, recover a missed reaction, build tighter short clips, and change pacing once you see how the conversation plays on screen.
If your team regularly makes reels, highlight cuts, or alternate versions of the same episode, ISO recording gives you room to correct and repurpose.
It also creates more work. More files. More storage. More edit time. More decisions.
Which one fits your show
This is less about technology and more about business model. A solo creator publishing quickly may prefer live switching. A brand show that needs polish across multiple platforms usually benefits from ISO.
Here's the simplest way to choose:
| Workflow | Strong fit for | Main compromise |
|---|---|---|
| Live switching | Fast release schedules, small teams, live-oriented formats | Less flexibility after recording |
| ISO recording | Branded content, agency work, clip-heavy distribution | More post-production time |
If you're weighing whether to build this into your own room or use a ready-made environment, it helps to look at in-house podcast studio options and compare what's included operationally, not just visually. The room is only part of the answer. Monitoring, switching, recording discipline, and file management are where the workflow either holds together or doesn't.
A lot of creators buy cameras first and answer this question too late. That usually leads to a setup that's technically impressive but operationally annoying.
Mastering Post-Production and Content Repurposing
The recording session creates the raw material. Post-production decides whether that material becomes a polished episode or a folder full of good intentions.
Multi-camera editing is manageable when the footage is organized. It becomes miserable when clips are mislabeled, color is inconsistent, and the team starts thinking about social media after the episode is already finished.
Cut the episode with intention
Most modern editors, including Final Cut Pro and DaVinci Resolve, make multicam editing straightforward once your footage is synced. The core job is simple. Build one synchronized sequence, monitor all angles, and switch based on whoever owns the moment.
That doesn't mean cutting constantly. Fast switching can make a calm interview feel nervous. Slow switching can make a lively conversation feel sleepy.
Use a few principles:
- Cut on meaning: Change angles when the speaker changes, the emotion shifts, or the reaction matters.
- Use the wide shot strategically: It resets the eye and helps hide transitions.
- Match color early: If cameras don't look related, every angle change feels like a mistake.
- Clean the audio first: Viewers forgive visual simplicity before they forgive distracting sound.
For creators trying to turn episodes into written assets as well, a transcript helps a lot. If you need a practical workflow for that part, SpeakNotes has a solid guide to transcribing audio that can support show notes, clips, articles, and repurposed content.
Plan vertical before you hit record
Most podcast setups still lag in this area. They're built for the full episode, then awkwardly cropped into shorts later.
One advanced walkthrough introduces a dedicated fourth vertical angle specifically for short-form repurposing, a sign that more creators are planning for multi-platform output from the start in this video breakdown of vertical clip planning. That idea matters because vertical clips don't behave like trimmed-down YouTube episodes. They need framing that already respects the platform.
The best reel often isn't discovered in post. It was protected during production.
You don't always need a separate vertical camera, but you do need to think about safe framing. If a close-up is too wide, a vertical crop can feel empty. If two speakers sit too far apart in the horizontal master, the short clip becomes a compromise.
A simple repurposing system
A practical post-production pipeline looks like this:
- Finish the hero episode first. Get the long-form cut approved.
- Pull moments, not random soundbites. Clips perform better when they carry a complete idea.
- Reframe with intention. Don't let auto-cropping decide every shot.
- Add text that supports, not clutters. Captions should improve clarity, not suffocate the frame.
If your team wants a cleaner editorial system around this stage, it helps to review post-production best practices for podcast episodes. A lot of the friction creators blame on editing starts during pre-production and recording choices.
Post is where good setups prove they were designed intelligently. It's also where weak setups expose every shortcut.
The Ultimate Shortcut to a Flawless Production
A lot of shows hit the same wall after the first few strong episodes. The conversation is working, the audience is responding, and then production starts eating the calendar.
Building your own multi-camera setup can still be the right call. But the actual cost is rarely the camera body or switcher. It shows up in setup time, troubleshooting, file management, retakes caused by technical misses, and the mental load of watching the gear while trying to host a good conversation.
What the professional shortcut actually changes
A professional environment changes the job itself. Instead of spending the session checking exposure, monitoring storage, fixing a cable issue, and wondering whether the lighting still matches shot to shot, the host can stay focused on delivery.
That shift matters because strong video podcasts are performance-driven. Guests respond better when the room feels controlled. Hosts listen better when they are not splitting attention between the discussion and the recorder. Teams move faster when the workflow is already built, tested, and repeatable.
Using a turnkey environment also changes the economics of the week. One production day can become a reliable content capture system rather than a technical experiment.
When DIY still makes sense
DIY works well for a specific type of creator.
- Production is part of the interest: Some hosts are keen to build, test, and refine their own rig.
- The release schedule is light: A monthly show has more room for setup friction than a weekly content engine.
- You already have support: An in-house editor, producer, or operator can absorb a lot of the operational burden.
In that case, buying gear is not the only option. Testing first usually leads to better decisions. Using podcast equipment rental options lets you pressure-test a camera plan, lighting package, or recording workflow before you commit budget to permanent gear.
When a studio path makes more sense
The studio route starts to win when time has a higher value than experimentation.
That usually applies to:
- Founders and executives who need to show up prepared, record, and leave with usable content
- Marketing teams building repeatable branded episodes without reinventing the process each week
- Agencies managing production for clients on deadlines
- Creators recording in batches who need one session to feed a full publishing cycle
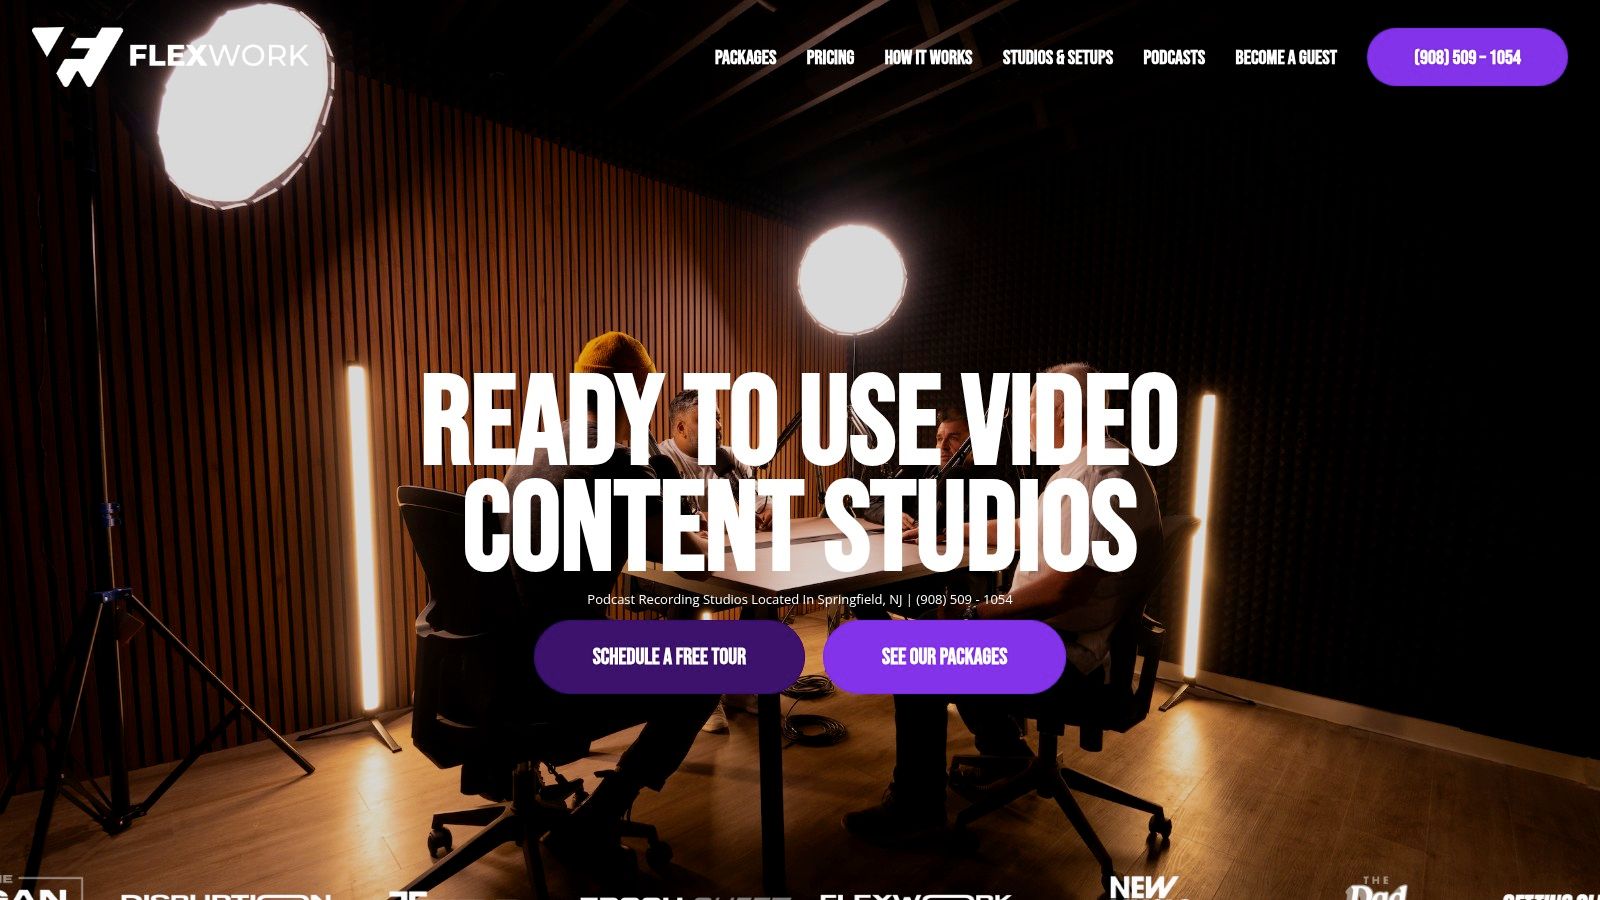
Flexwork Podcast Studios supports that model through its Springfield, NJ facility with acoustically treated recording spaces, multi-camera podcast production, equipment rentals, production support, editing, and content services.
The package logic behind the shortcut
The smartest production choice usually matches the bottleneck.
If your team struggles to get cameras and audio ready on recording day, studio time solves a setup problem. If recording goes fine but post-production stalls for weeks, producer support and editing matter more than another lens purchase. If the business needs episodes, clips, and stills from the same session, batch production becomes the more efficient path.
That is why service packages matter. They are not just pricing formats. They are workflow decisions.
Some creators only need a room and gear. Others need a producer, camera operation, and a post pipeline that turns one session into multiple publishable assets. The more often a team records, the more valuable that system becomes.
A practical framework for choosing the path
Use a simple test:
- If production setup keeps delaying the record date, reduce technical ownership.
- If editing keeps delaying release, add post support earlier in the workflow.
- If content volume is the goal, batch record and plan repurposing before the session.
- If on-camera brand perception matters, stop treating the visual side as an afterthought.
A professional setup protects creative energy. The host should be listening, leading, and responding in real time, not wondering whether Camera B stopped recording.
There is nothing wrong with learning the production side. I recommend it for many creators. But once a show starts proving business value, the better decision is often the one that removes friction from the repeatable parts of the process.
That is the shortcut. Choose the path that lets the team record confidently, leave with usable assets, and publish consistently without rebuilding the system every week.
If you're ready to stop wrestling with your setup and start producing sharper episodes, reels, and branded content with a cleaner workflow, explore Flexwork Podcast Studios and choose the production path that fits your show.